3. User Management
User management provides an effective way to oversee the management of user accounts and other administrative activities as well. User management helps to have varying levels of controlled access. It allows users to manage accounts, products, environments, users, roles,and groups.
The Automaton has three predefined user roles: Super Admin, Admin and User. A user may be entitled to more than one user type.
3.1. Super Admin
Super Admin is the super-user who has access to many administrative tasks in the user management module.
A Super Admin can:
1.Create/modify/delete Accounts.
2.Create/modify Admins.
3.Assign Admins to Accounts.
Note
The Super Admin cannot perform product related activities.
A Super Admin is created in the backend and given unique login credentials to the product. Any regular web browser client can be used by users (such as Google Chrome, Firefox, or any other browser). Go to the URL: localhost/superlogin/, which will take you to the login screen shown below.
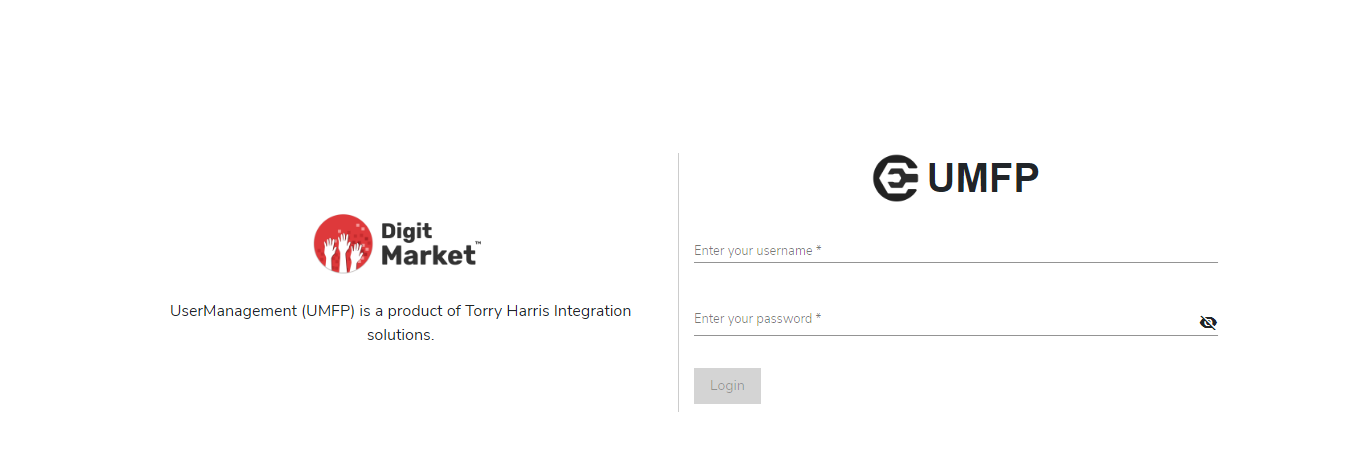
Fig. 3.1 Login Page
On the Login page, populate the mandatory details:
1.In the Enter your Username field, enter your username. 2.In the Enter your Password field, enter your password.
Click Login.
The landing page is displayed based on the user role assigned to you: Super Admin, Admin and User.
On the above page provide the super admin credentials
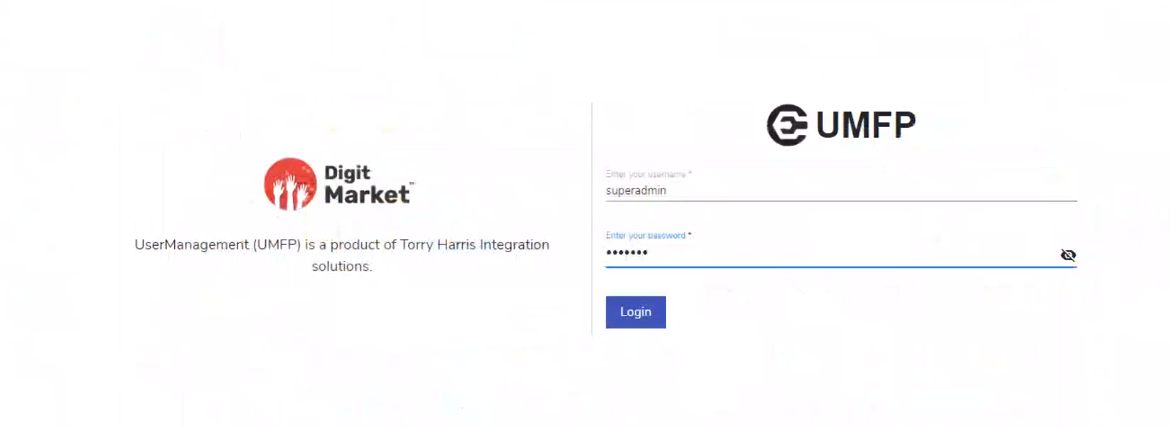
Fig. 3.2 Super Admin Login
As a Super Admin, when you sign in to the user management application, you will see the Super Admin Dashboard as shown below:
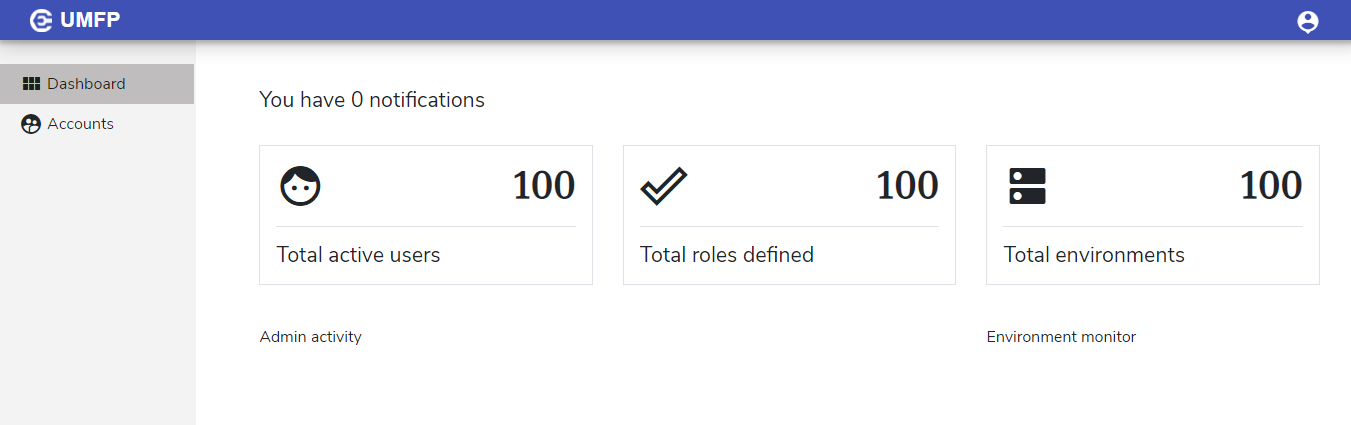
Fig. 3.3 Super Admin Dashboard
3.1.1. Dashboard
The dashboard will show the total number of active users, roles defined, and environments.
3.1.2. Accounts
Organizations create accounts to tailor the application’s functionality for individuals who operate under their accounts. Accounts are created by the Super Admin. Super Admin assigns Admins to each account when it is created to oversee its operation. Sub-accounts can be created within an account. Sub-accounts are created by administrators or individuals with the authority to do so. An account/sub-account can have several users linked with it. An environment can be connected with each account/sub-account.
3.1.2.1. Create an Account
To create an account:
- On the Accounts screen, click Create a new account to open the Create account screen.
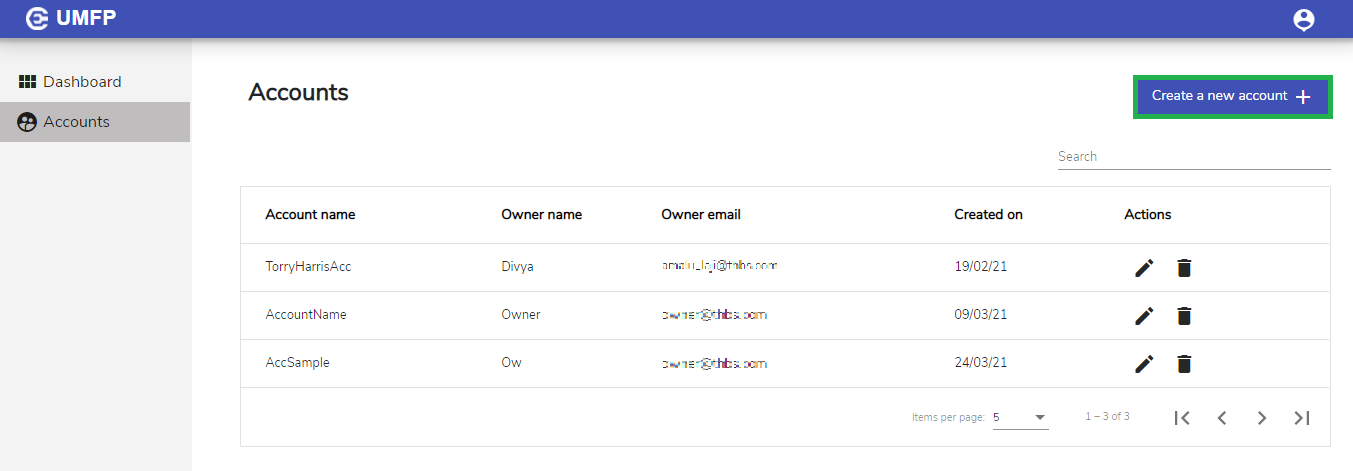
Fig. 3.4 Accounts
- On the Create account screen, under Account details tab, enter mandatory details such as:
- Account name
- Account owner
- Owner Name
- Email Id
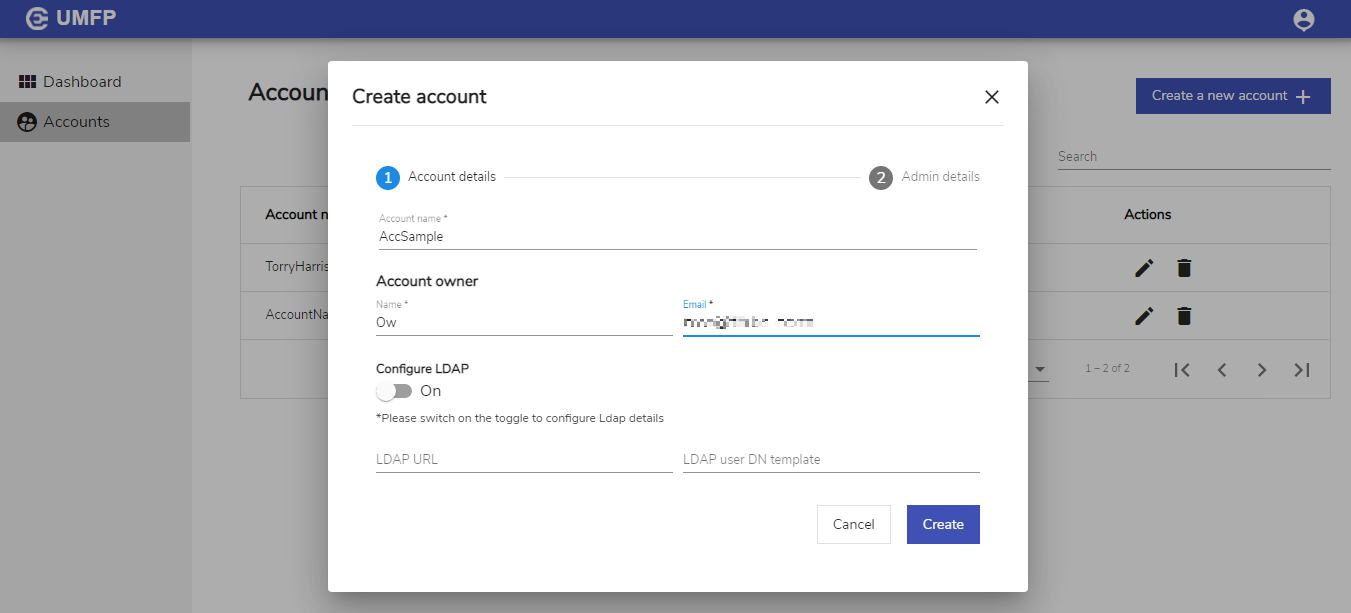
Fig. 3.5 Create Account – Enter Account Details
- Configure LDAP
Click Create to add Admin details or click Cancel button to exit. If the user clicks the Create button a success message and navigate to Update Account dialog will be displayed as shown below:
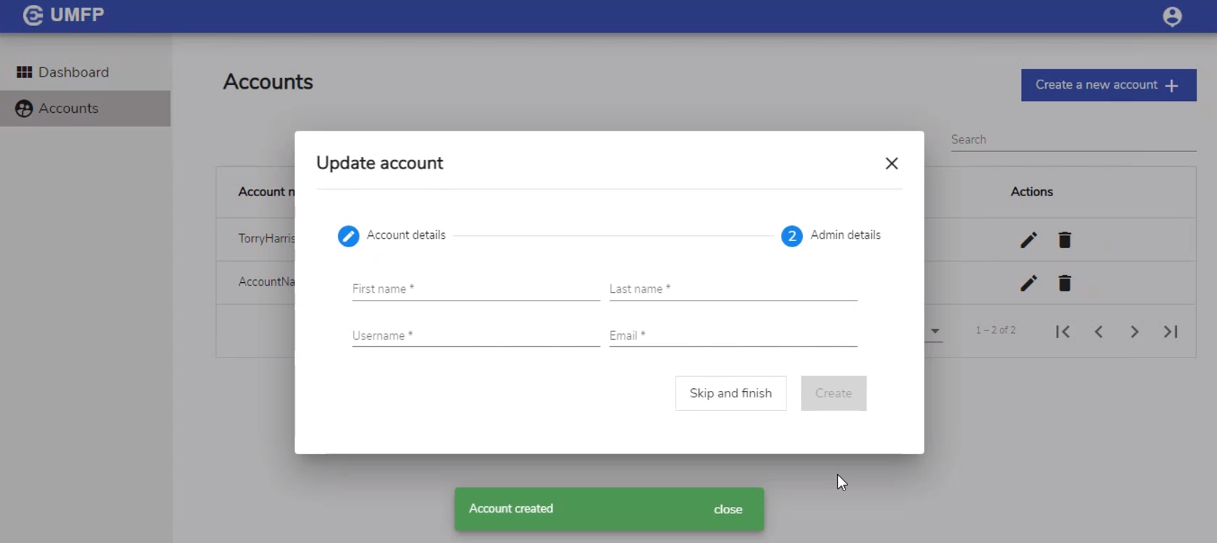
Fig. 3.6 Account Created Successfully
Then users must provide the Admin details in the Update account dialog as shown below:
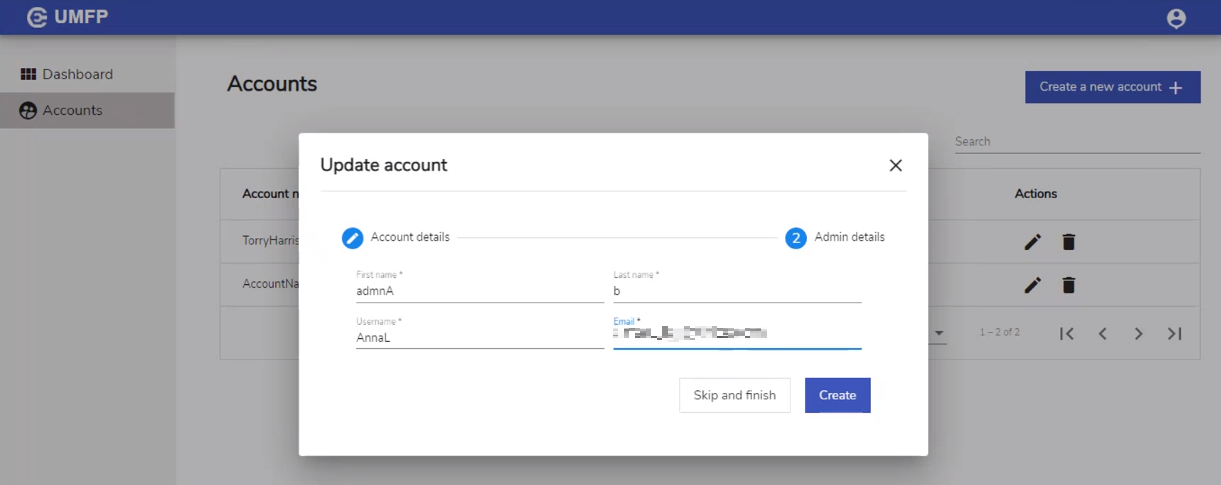
Fig. 3.7 Update Account
Click Create to complete the account creation process or click Skip and finish to exit without adding Admin details. If Admin details are added, the user will receive a mail in the associated email id with the account name, username and password. They can login to the application using these details.
3.1.2.2. Edit an Account
Admins or users with Admin rights can edit an account.
To edit an account:
- Click the edit icon
 corresponding to the account you want to edit.
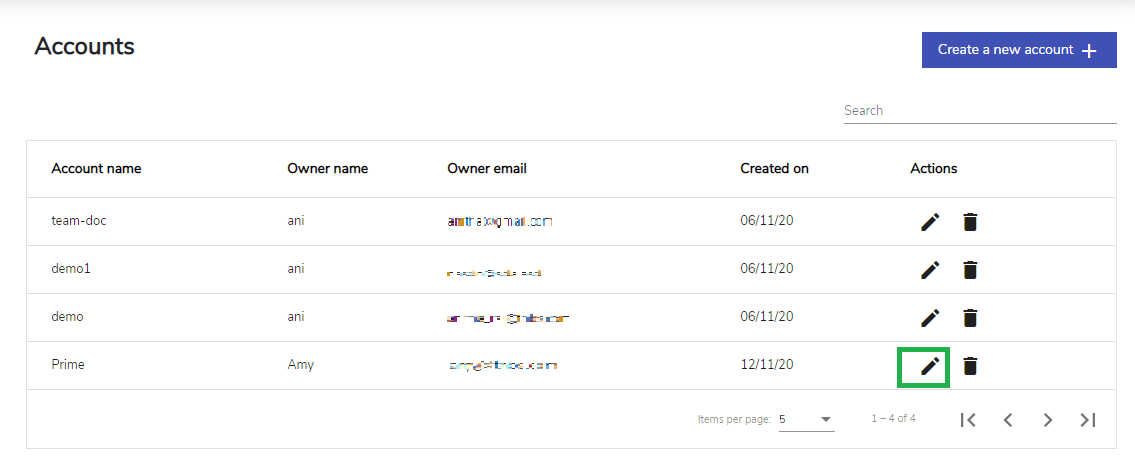
Fig. 3.8 Update Account
- The Update Account screen is displayed. Make the required modifications in the Account details/ Admin details tab.
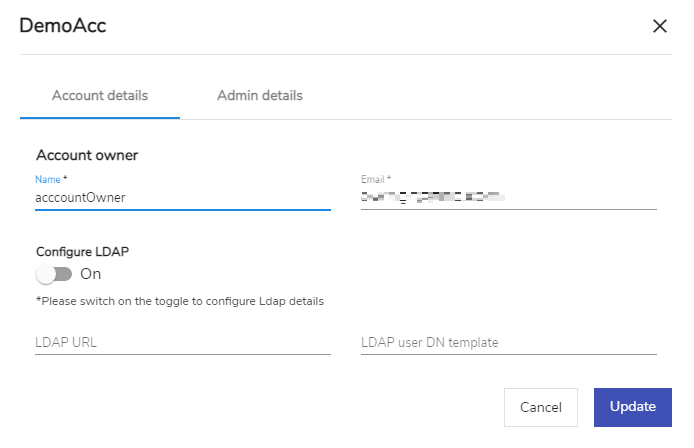
Fig. 3.9 Update Account
- Click Update if you have made changes to only Account details tab.
- Under the Admin details tab, Enter the mandatory details, such as:
- First name
- Last name
- Username
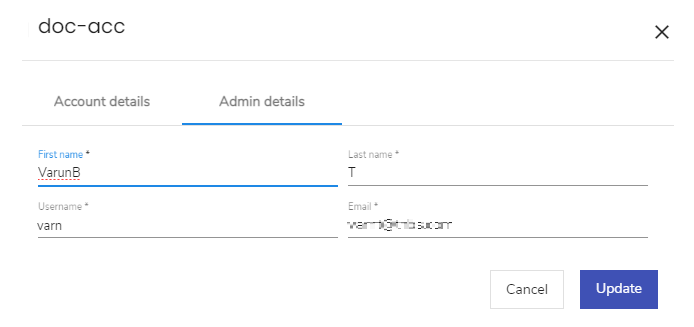
Fig. 3.10 Update Account
- Click Update if you have made changes to only Admin details tab or Cancel.
3.1.2.3. Delete an Account
To delete an account:
- Click the delete icon
 corresponding to account you want to
delete.
corresponding to account you want to
delete.

Fig. 3.11 Delete Account
- A confirmation message displays asking you to confirm your action. Click Yes to delete the account.
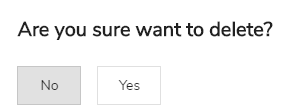
Fig. 3.12 Delete Account
Note
Only Super Admin can create/edit/delete accounts.
3.1.3. Sub - Accounts
Organizations can also set up sub-accounts of their main account. Sub-accounts are subsets of parent accounts. One user can belong to multiple sub-accounts. Sub accounts are created by Admins or users who have the capability to create sub-accounts.
3.1.3.1. Create a Sub-Account
To create a sub-account:
- On the Accounts screen, for the required account click Create sub-account.
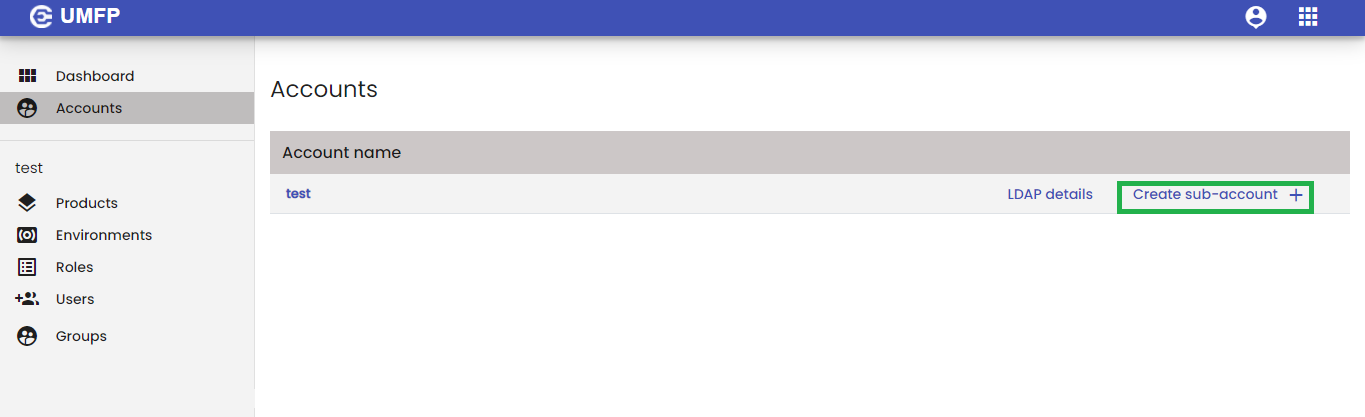
Fig. 3.13 Sub-Accounts
- The Create sub-account screen is displayed. On the Create sub-account screen, enter a name for the sub-account and click Create.
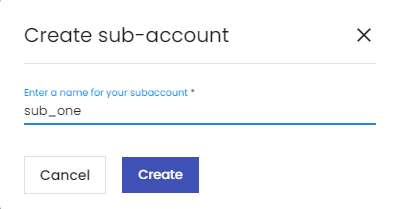
Fig. 3.14 Sub Accounts
The sub-account is created and displayed on the Accounts screen under its parent account. You can create any number of sub-accounts. You can edit or delete the sub-accounts using the edit or delete ![]() icons respectively.
icons respectively.
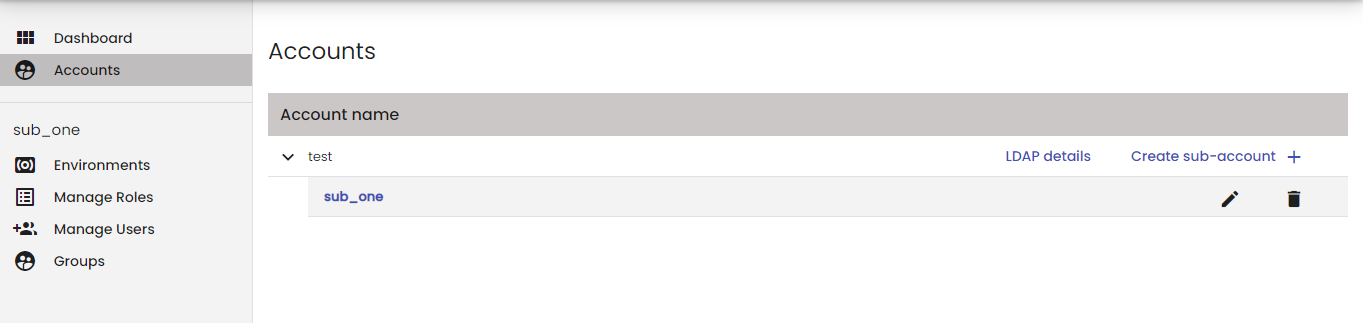
Fig. 3.15 Sub Accounts – List
The navigation panel on the left displays the sub-account name and the features that are accessible under that sub-account, namely: Environments, Manage Roles, Manage Users and Groups.
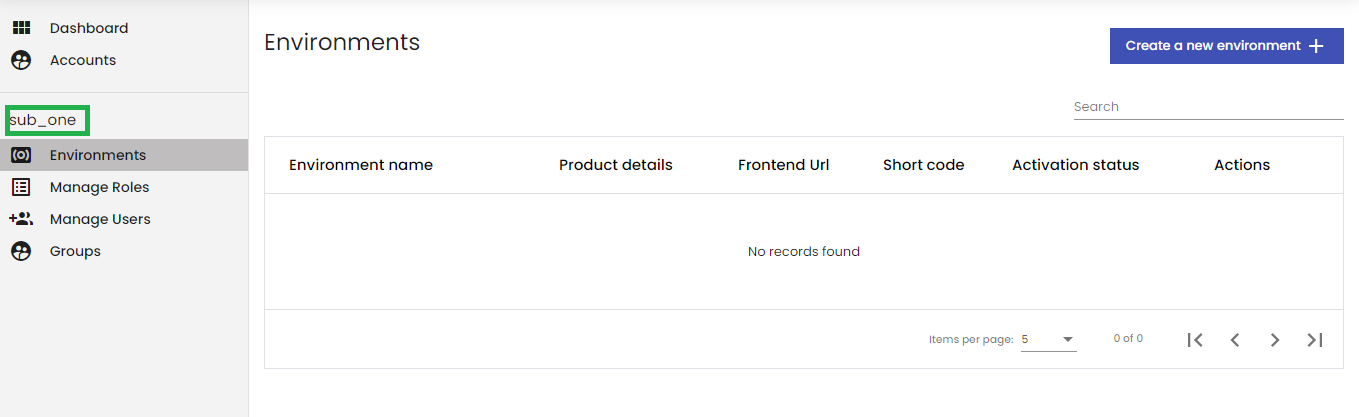
Fig. 3.16 Sub Account
3.1.3.2. Edit a Sub-Account
To edit a sub-account:
- Click the edit icon corresponding to the sub-account you want to edit.
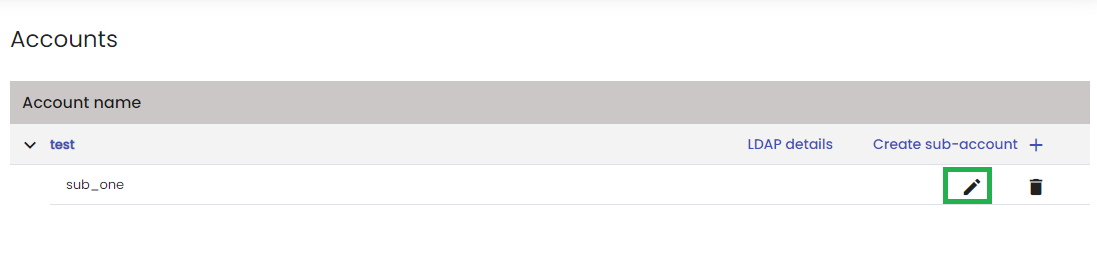
Fig. 3.17 Update Sub-Account
- The Update sub-account screen is displayed. Make the necessary modifications to the sub-account
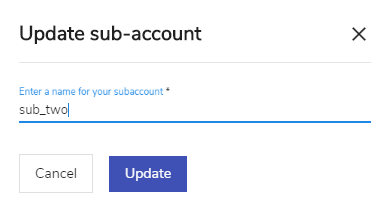
Fig. 3.18 Update Sub-Account
- Click Update to save the changes.
3.1.3.3. Delete a Sub-Account
To delete a sub-account:
- Click the delete icon
 corresponding to sub-account you want to delete.
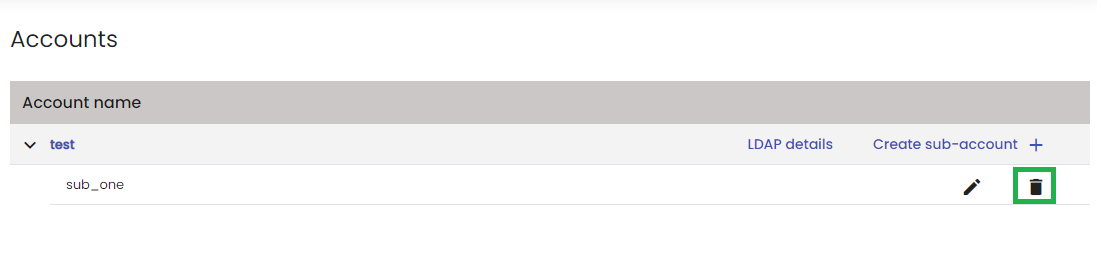
Fig. 3.19 Delete Account
- A confirmation message displays asking you to confirm your action. Click Yes to delete the sub-account.
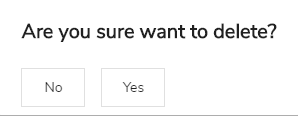
Fig. 3.20 Delete Account
3.1.3.3.1. Environments
Environments can be created for sub-accounts exclusively for that particular sub-account. Environments for sub-accounts are created in the same way as they are created for the parent account.
To create an environment:
On the left navigation panel, click Environment and then click Create a new environment.
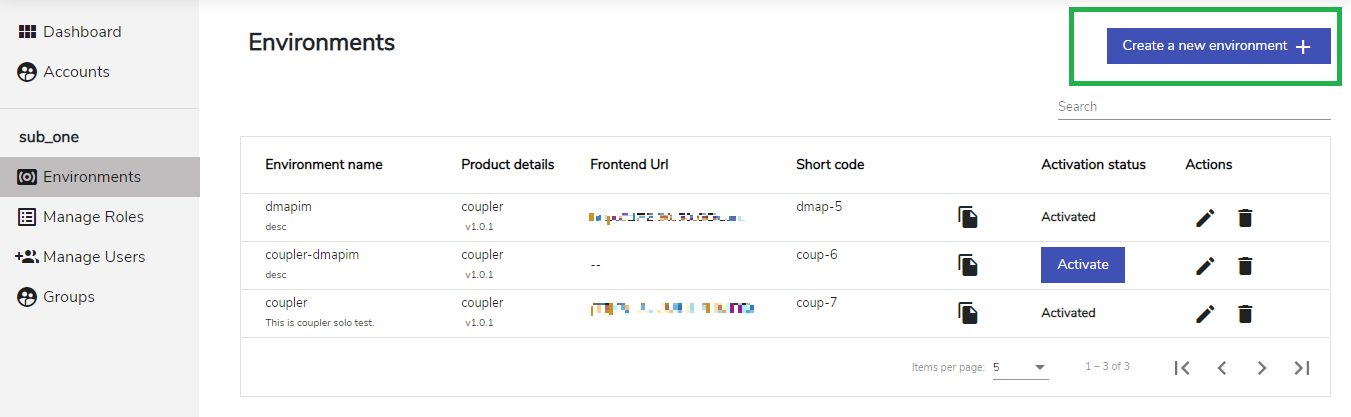
Fig. 3.21 Environment
The Register a new environment screen is displayed. On the Register a new environment screen, enter the following details:
- Environment name
- Environment Description
- Product
- Version
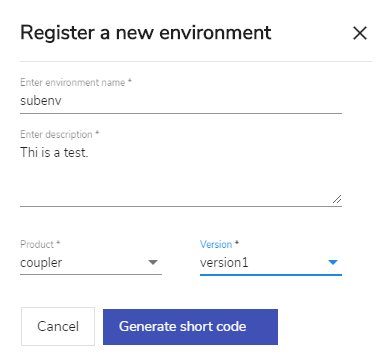
Fig. 3.22 Environment
Note
- Product and its version must be created previously for it to appear in the list.
- Product and its version can only be created at the Account level and not at Sub-account level.
- Click Generate short code. The Short Code is a unique identifier assigned to an environment. This value needs to be appended into the URL when the specific environment is being accessed by a client from the front end. Short code is unique across a sub-account.
The newly created environment is added to the list of environments on the Environments screen. The Environments screen displays details such as Environment name, Product details, Frontend Url, Short code, Activation status and Actions for each environment. Use the Search option to search for an environment from the list of environments.
Once you create an environment, you must activate it for it to be functional for the sub-account. To activate the environment, follow the steps under the section: Activate an Environment.
You can edit or delete created environments using the edit or delete ![]() icons respectively. Refer Edit an Environment and Delete an Environment for more details.
icons respectively. Refer Edit an Environment and Delete an Environment for more details.

Fig. 3.23 Environment
3.1.3.3.2. Manage Roles
Roles can only be created at account level. New roles cannot be created or deleted at sub-account level. Roles created at account level can be associated with environments created at sub-account level. For a sub-account, the role cannot be associated with an environment of another sub-account or an environment associated with the parent account.
- On the left navigation panel, click Manage Roles. Click on the required role among the roles list. The Products and capabilities tab is displayed.
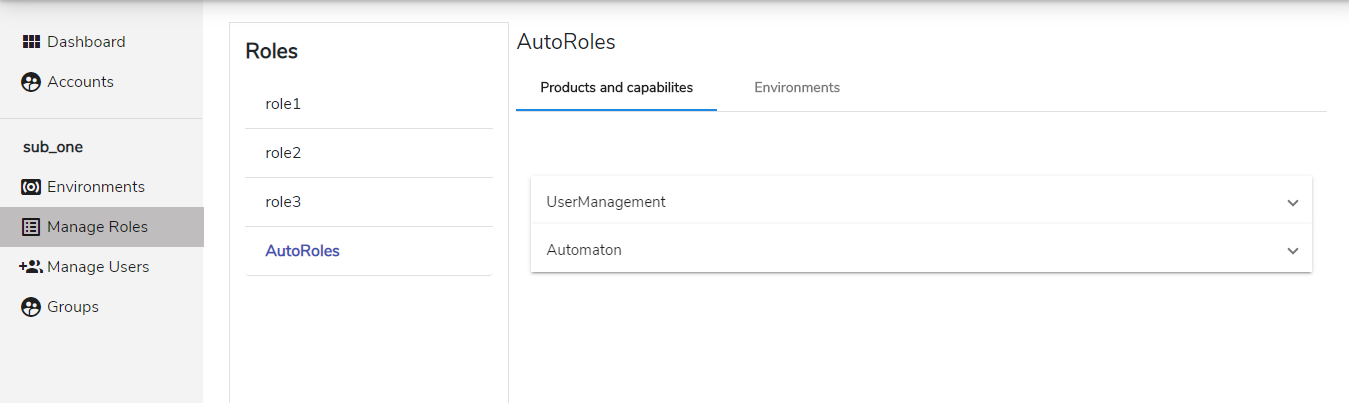
Fig. 3.24 Sub account roles
- Click on each product to view the capabilities under each product. This is a view-only section. All fields under this section will be disabled.
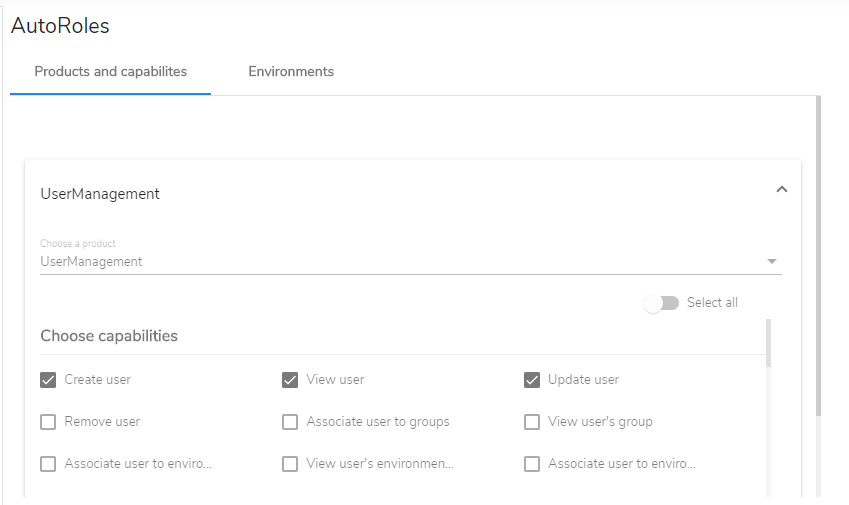
Fig. 3.25 View Capabilities
- Click the Environments tab to display the environments created at the sub-account level.
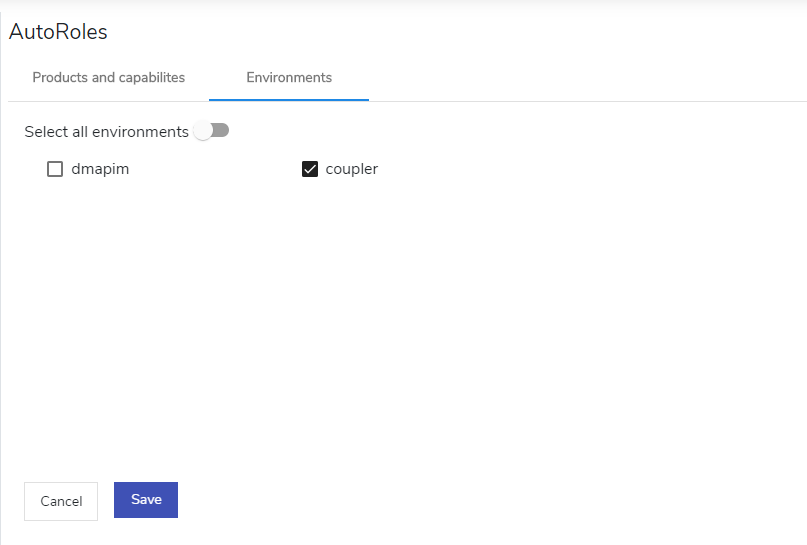
Fig. 3.26 Environments
- Click the required check box to select the environments to be mapped to the role. You can dissociate an environment from the role by deselecting the check box corresponding to that environment. Click the Select all environments toggle button to select all environments at one go. Inversely, click the Select all environments toggle button again to deselect all environments at one go.
- Click Save to save the changes.
3.1.3.3.3. Manage Users
Users can only be created at account level. New users cannot be created or deleted at sub-account level. Users from the parent account can be associated with multiple sub-accounts. These users can be assigned to environments that were created at sub-account level.
The Manage Users screen allows you to add users to the sub-account as well as assign environments (created at sub-account level) to these users.
To add users to the sub-account:
- On the left navigation panel, click Manage Users. The Manage Users screen is displayed. Under the Add users tab, users created at the Account level are displayed.
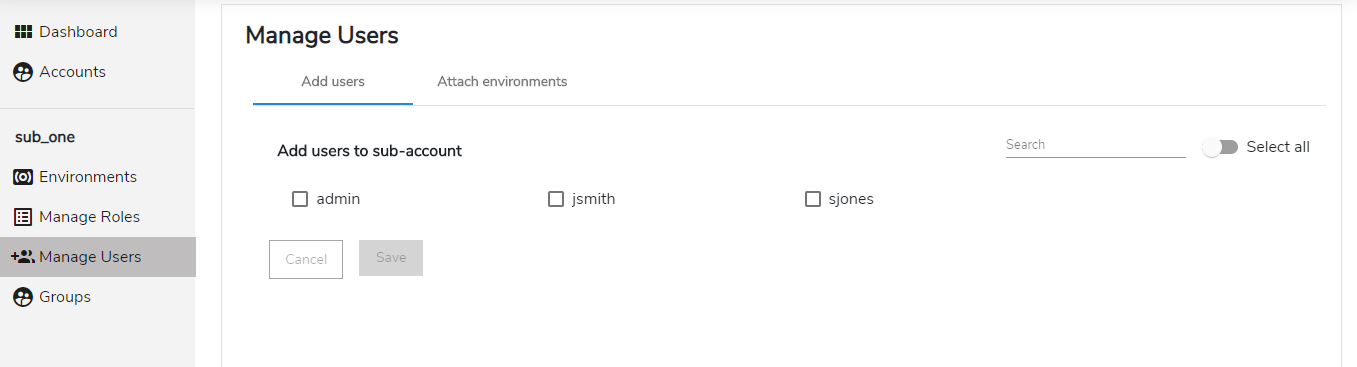
Fig. 3.27 Manage Users
- To add a user from the parent account to the sub-account, click the required check box to select the users to be mapped to the sub-account. You can dissociate a user from the sub-account by deselecting the check box corresponding to that user.
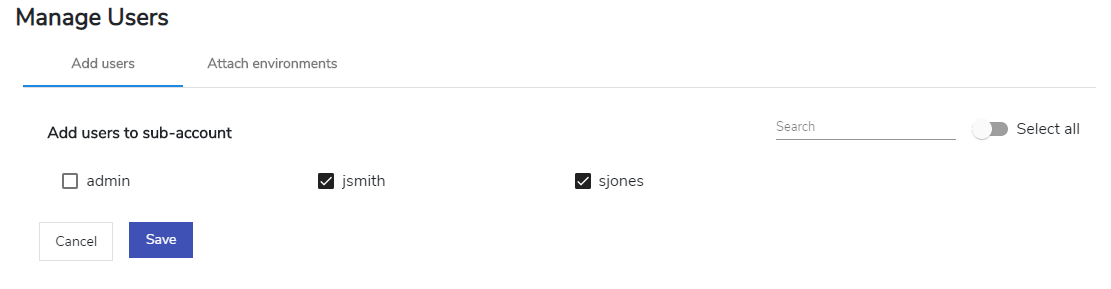
Fig. 3.28 Manage Users
- Click the Select all toggle button to select all users at one go. Inversely, click the Select all toggle button again to deselect all users at one go.
- Click Save. The user is saved to the sub-account. Use the Search option to search for users among the ones displayed.
To attach users to environments:
The users that are displayed under the Attach Environment tab are the users that were added in the Add Users screen.
- From the list of users on the left panel, select the required user and click Add an environment.
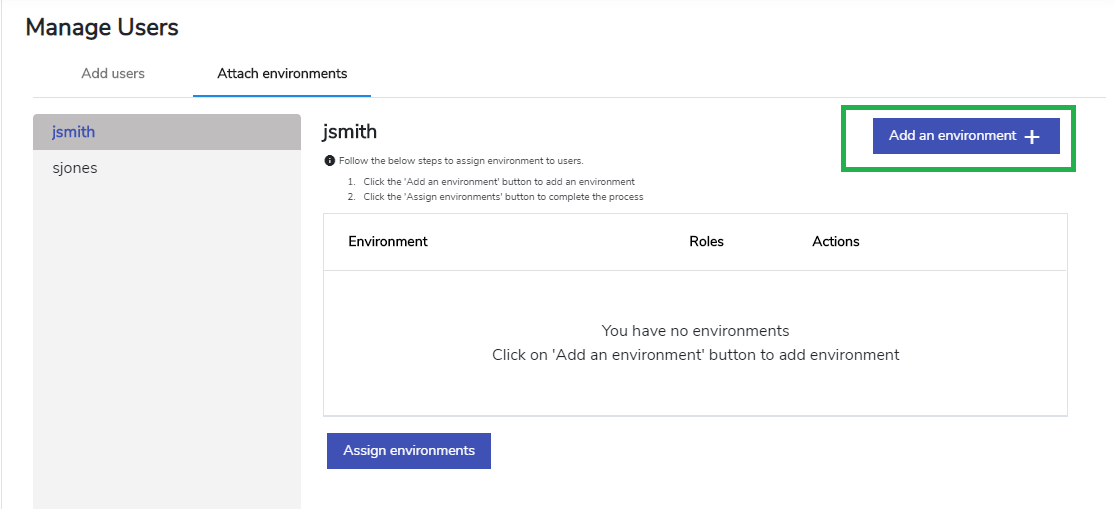
Fig. 3.29 Attach Environments
Note
Add an environment button will be disabled if the user has been added to all the environments under a particular sub-account.
- On the Assign an environment screen, from the Select a environment drop-down, select the required environment.
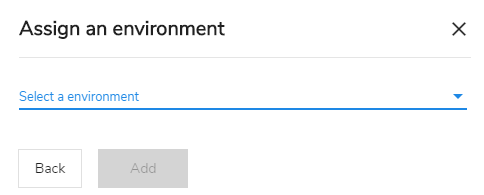
Fig. 3.30 Assign an Environment
Note
Only the environments created at sub-account level are displayed in the drop-down.
- To choose roles for the selected environment, click the required check box to select the role type. Available options are displayed based on the environment roles created at Account level.
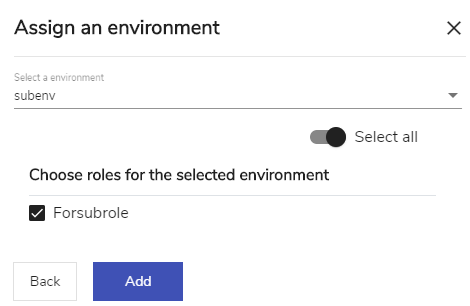
Fig. 3.31 Add Environment
- Click the Select all toggle button to select all roles at one go. Inversely, click the Select all toggle button again to deselect all roles at one go.
- Click Add.
Note
User can be added to multiple environments under a sub-account.
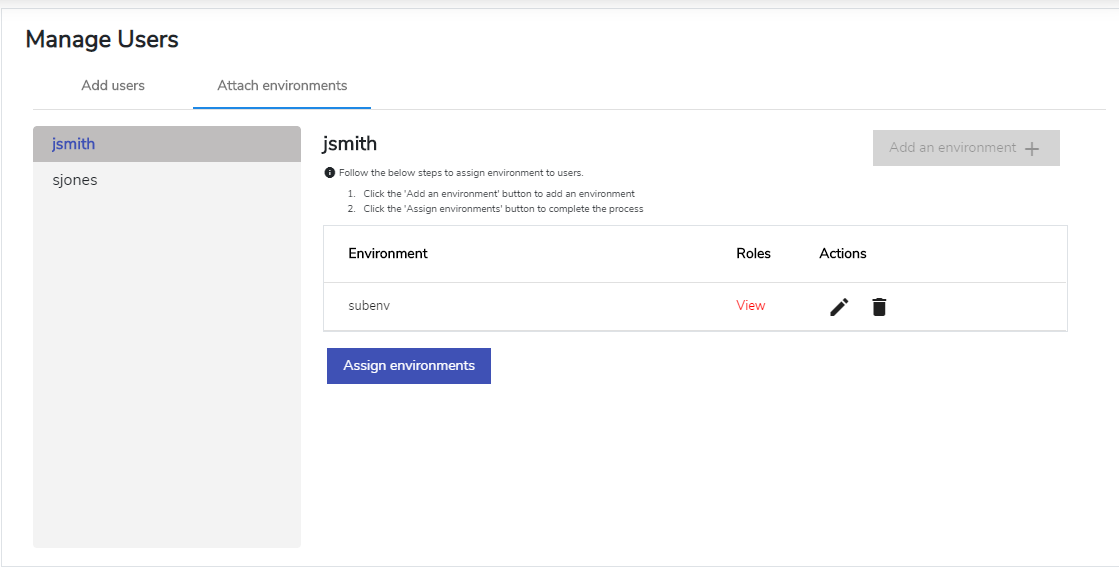
Fig. 3.32 Add Environment
- Click Assign Environments to complete associating user’s environment roles.
For a particular user, the screen displays details such as Environment, Roles and Actions. Once the role is associated to the user, it will be visible in a view only format. Click View to view the associated roles.
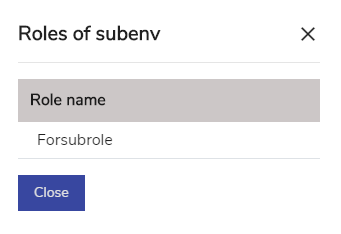
Fig. 3.33 View Roles
You can edit or delete the environment created by you using the edit or delete ![]() icons respectively.
icons respectively.

Fig. 3.34 Edit/Delete Environment
To edit an environment:
Click the edit icon
corresponding to the environment you want to edit. The Assign an environment screen is displayed.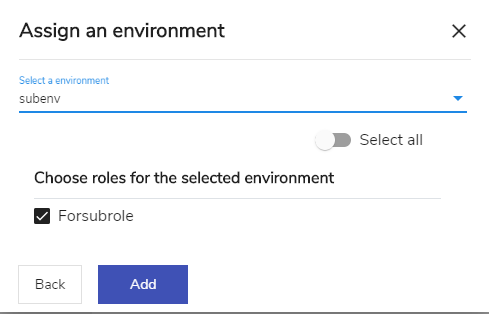
Fig. 3.35 Edit
Make the necessary modifications and click Add to save the changes.
Click Assign Environment to complete editing the environment.
To delete an environment:
- Click the delete icon corresponding to environment you wish to delete.
- Click Assign Environment to complete deleting the environment.
3.1.3.3.4. Groups
Groups can be created at sub-account level. Only users under the sub-account can be added to these groups. A group can be assigned to more than one environment created at sub-account level.
To create a group:
On the left navigation panel, click Groups and then click Create a new group.
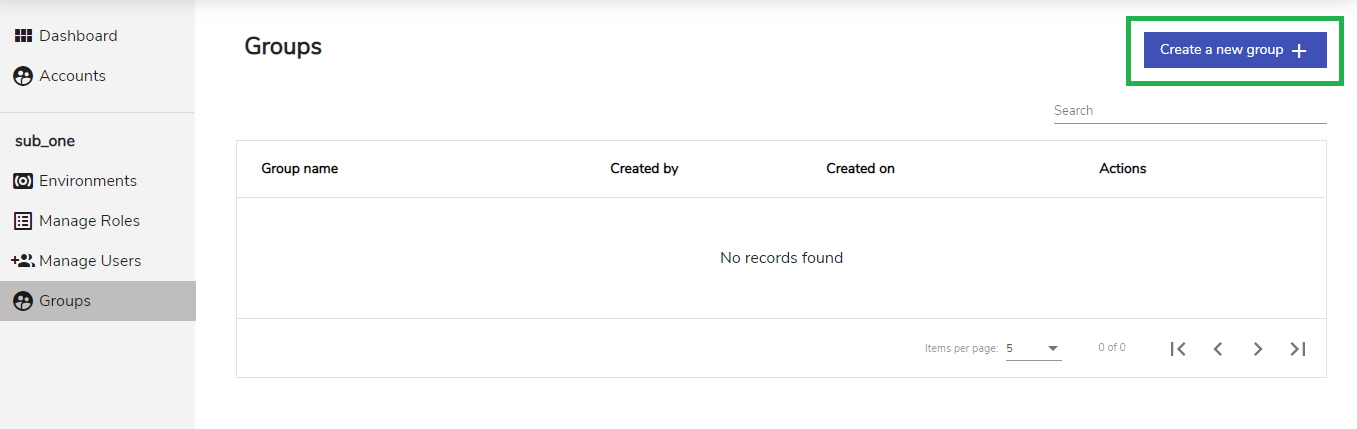
Fig. 3.36 Sub Groups
The Create group screen is displayed. Under the Enter Group Details tab, enter the Group Name.
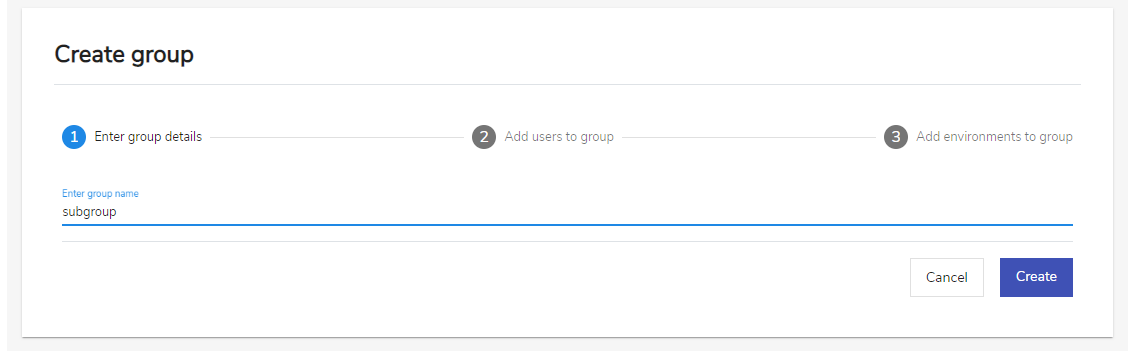
Fig. 3.37 Enter Group Details
Click Create. The group is created and you are navigated to the next tab. Once you create a group, you need to add users to the group, assign environment and roles to the group. You can choose to perform these tasks now or later. The newly created group is added to the list of groups on the Groups screen.
On the Add Users to Group tab, you can view the List of all Users box on the left and Group Users box on the right. List of all users box displays the list of all users under the sub-account you are managing. Group users box displays the list of users who will be assigned to the particular group.
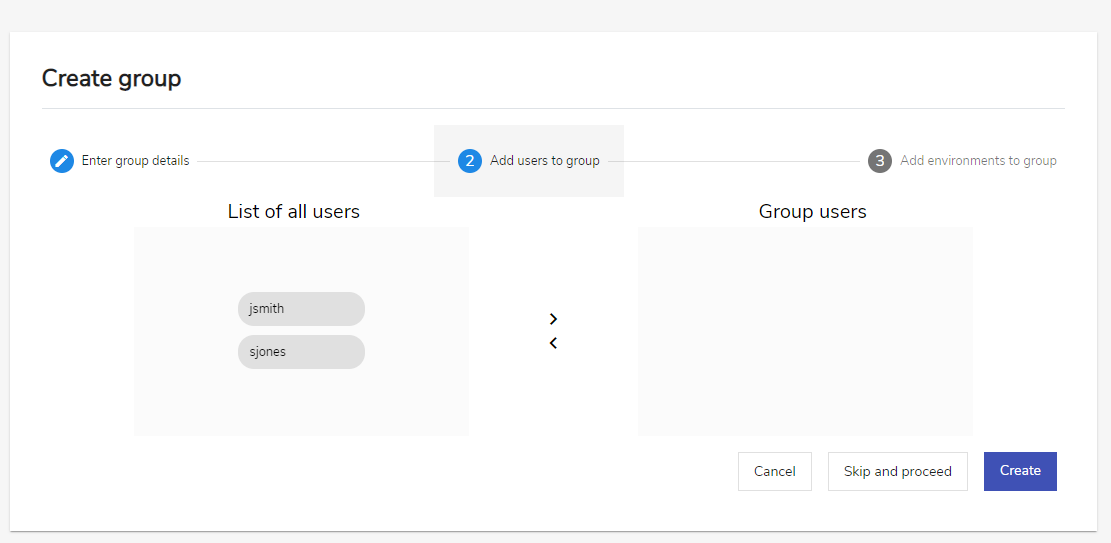
Fig. 3.38 Add users to group
In the List of all users box, click to select the user you want to add to the group and then click > icon to add that user to the Group users box on the right. Inversely, click to select the user you want to remove from the Group users box and then click the < icon.
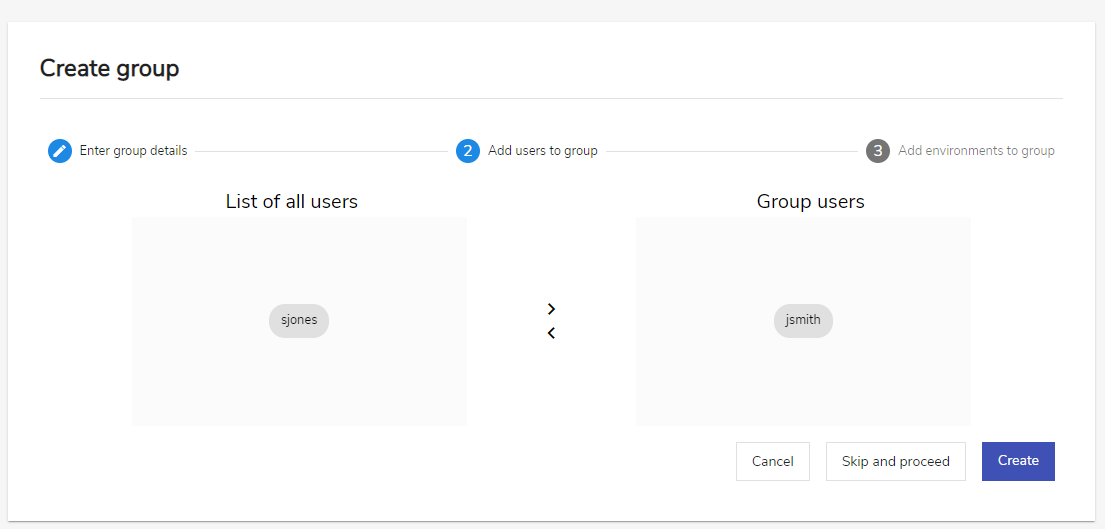
Fig. 3.39 Create Group – Add users to group
Click Create to confirm or click Skip and proceed to go to the next tab without adding users to a group.
Under the Add Environment to Group tab, click the plus icon
 to expand the Assign Environment to Group tab and add an environment.
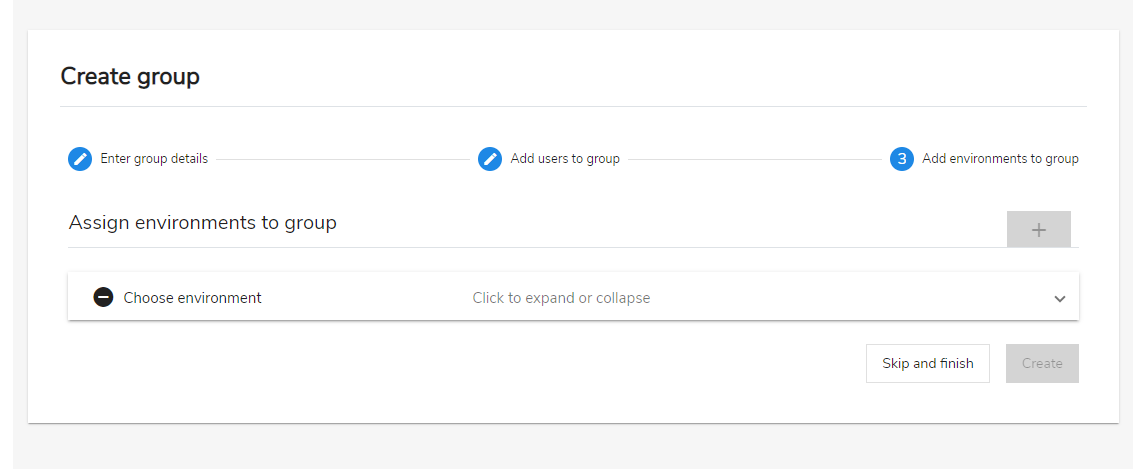
Fig. 3.40 Create Group – Add environment to group
- Click Choose Environment tab to select the required environment from the list.
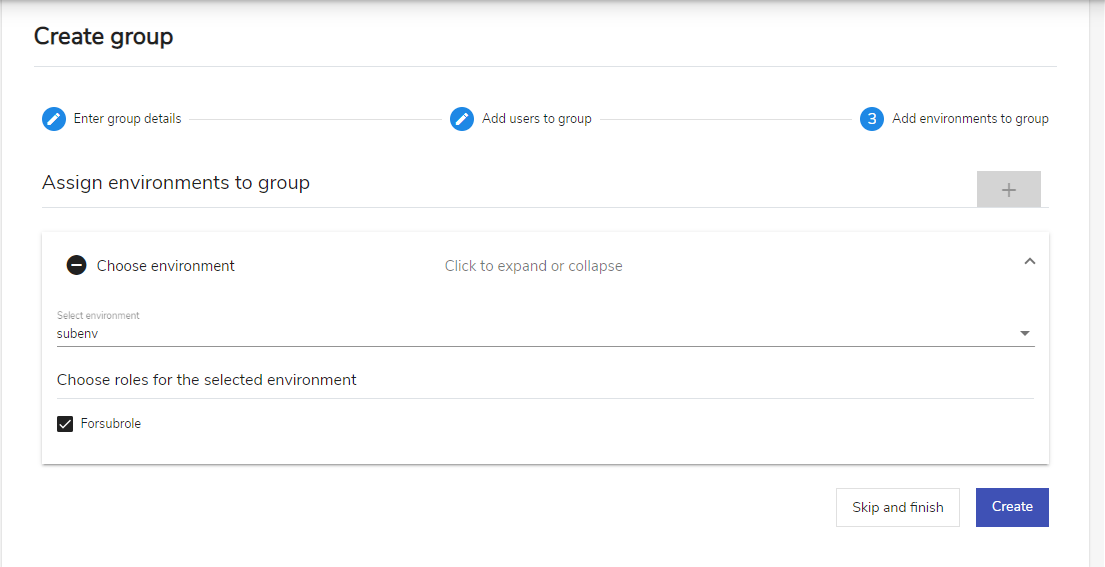
Fig. 3.41 Create Group – Add environment to group
Note
- You can assign a group to more than one environment.
- You can only choose environment from a list of already created environments in the sub-account.
- Click Create to confirm or click Skip and proceed to navigate to next tab without adding an environment.
The Groups screen displays details such as Group Name, Created By, Created On and Actions for each group. You can edit or delete groups created by you using the edit or delete icons ![]() respectively. Refer Edit a Group and Delete a Group for more details. Use the Search option to search for a group from the list of groups.
respectively. Refer Edit a Group and Delete a Group for more details. Use the Search option to search for a group from the list of groups.
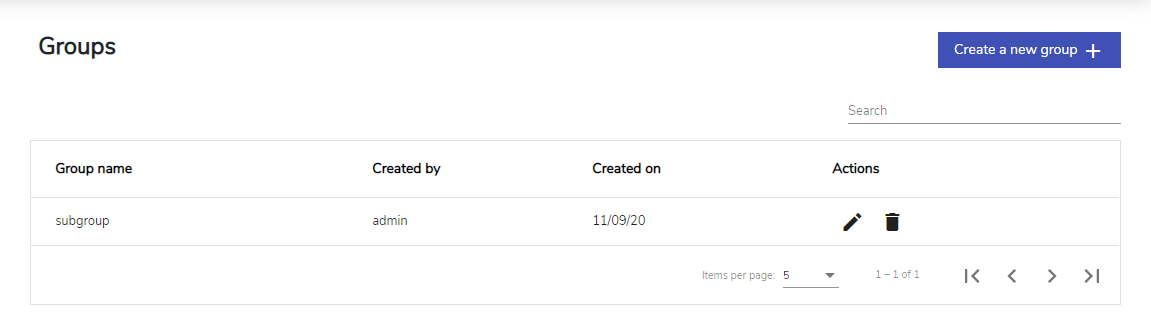
Fig. 3.42 Edit/Delete Groups
3.2. Admin
Admins are the authoritative users of the user management application who have access to both admin and product-related activities, but only for the accounts to which they have been assigned. Super Admin creates Admins, and then assigns them to accounts. By default, all user management application capabilities are assigned to Admins.
An Admin can:
- Create/modify/delete Users.
- Register a Product and its versions.
- Edit/Delete a Product and its versions.
- Assign Users to Groups.
- Assign Roles to Users.
- Assign Environment to User.
- Create/modify/delete Roles.
- Create/modify/delete Groups.
- Add Environment to Group.
- Add Roles to Group.
- Create/modify/delete Environment.
If you are an admin/user, in your browser’s address bar, enter the url: localhost/login to access user management login page for Admins/Users.
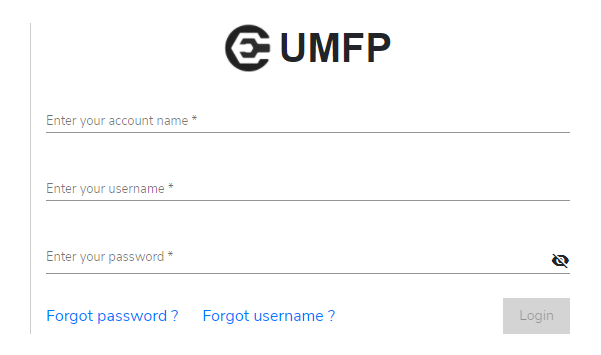
Fig. 3.43 Admin/User login
- On the Login page, populate the mandatory details:
- In the Enter your Account Name field, enter your account name.
- In the Enter your Username field, enter your username.
- In the Enter your Password field, enter your password.
- Click Login.
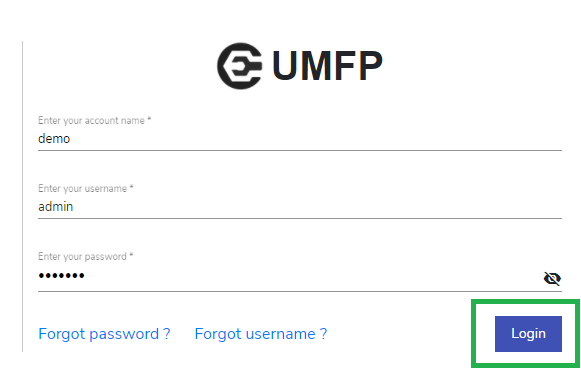
Fig. 3.44 Login
The landing page is displayed based on the user role assigned to you: Super Admin, Admin and User.
Note
As a user, if you exceed the limit of login attempts, your account will automatically get locked. To recover your account, you must contact the account Admin.
3.2.1. Accessing Automaton
Click the tile menu  next to the user menu icon to list all the environments for the logged-in user.
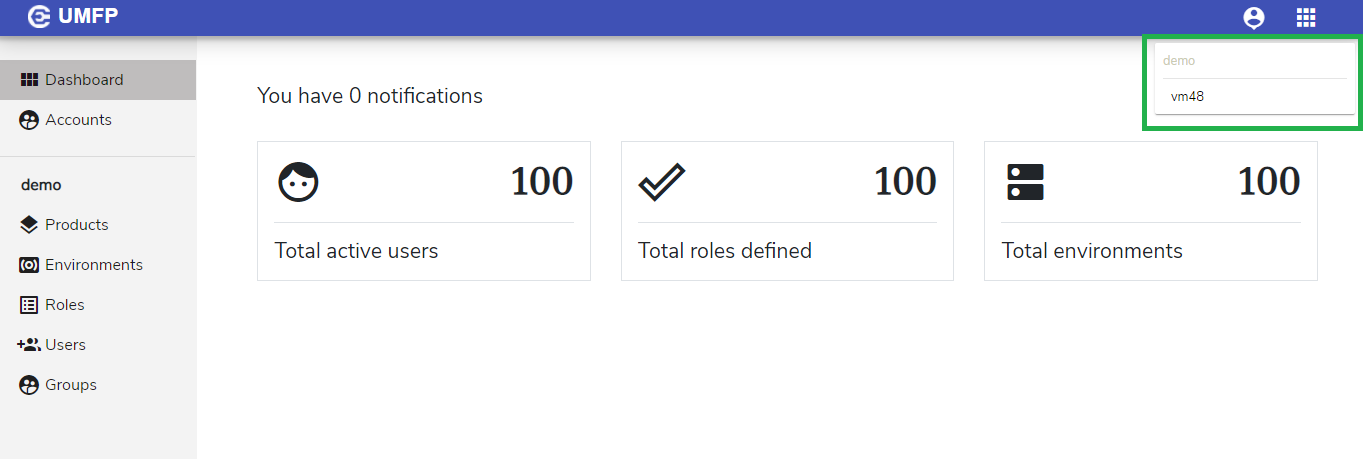
Fig. 3.45 Environment
Click on an environment to navigate to the Automaton Homepage. Click the Features to see the homepage .
3.2.2. Change password
The Change password feature allows both LDAP and native users to change their account password from within the UMFP application.
Click the user menu icon
 and then click Change password.
Fig. 3.46 Change Password
The Change password screen is displayed.
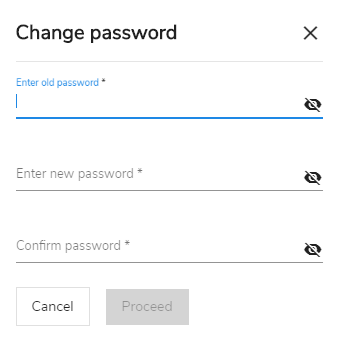
Fig. 3.47 Change Password
In the Enter old password field, enter your existing password that you want to change.
In the Enter new password field, enter your new password that you want to use from here on.
In the Confirm password field, re-enter the new password.
Click Proceed to save changes to the password. When you change the account password, you will receive a mail in the associated email id. Login to the application again using the updated password.
3.2.3. Forgot Username
The Forgot Username feature allows the users to retrieve their forgotten username.
- On the Login page, click Forgot Username?.
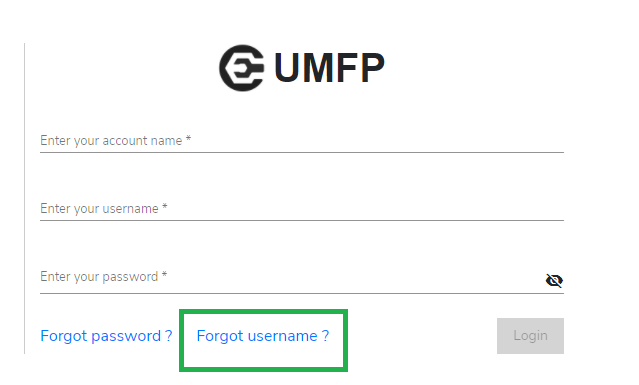
Fig. 3.48 Login – Forgot Username
- Enter the Account Name and the Email ID and click Get Username to get the username. Click Discard and go back to login page to return to the Login page to discard the action.
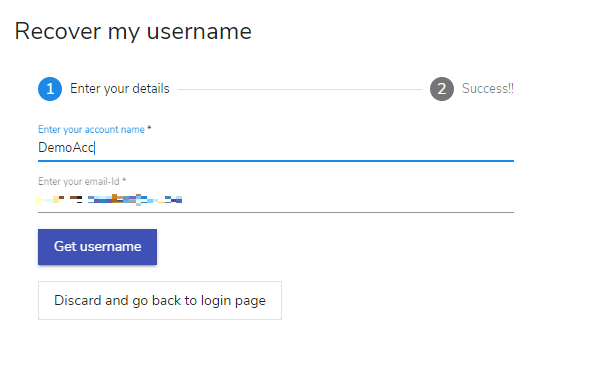
Fig. 3.49 Get Username
- The users will receive the username on their registered email address. Click Go to Login page to return to the Login page. Click Reset my password to reset your account password.
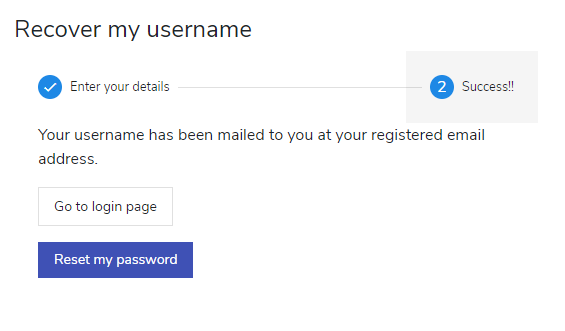
Fig. 3.50 Success message
You can either reset your password from this page or using the Forgot Password feature. The steps for resetting the password is the same in both the scenarios.
3.2.4. Forgot Password
The Forgot Password feature allows the users to reset their account password and regain access to their account. Resetting the account password involves OTP verification via registered email ID.
- On the Login page, click Forgot Password?.
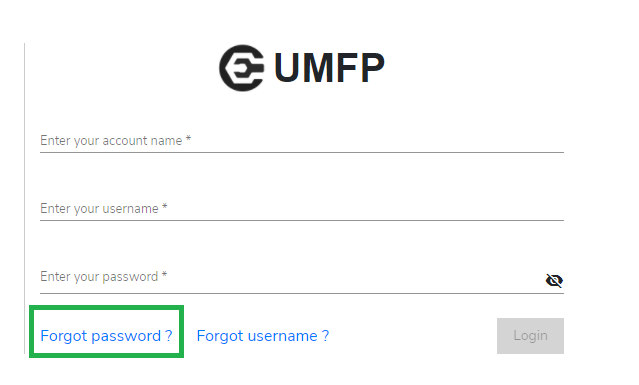
Fig. 3.51 Login – Forgot Password
- Enter the Username/Email ID associated with your product account and click Get OTP to receive an OTP on your registered email ID. Click Discard and go to Login page to return to the Login page.
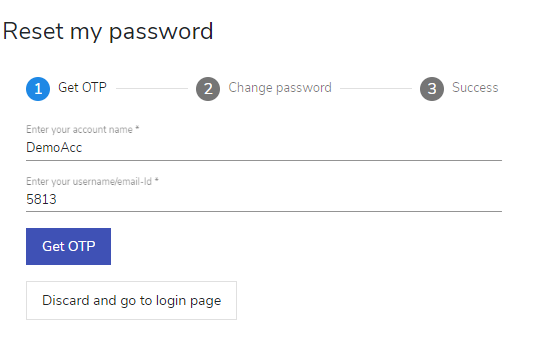
Fig. 3.52 Enter Username/Email ID
Note
You will not be able to proceed to the next page unless you enter valid email ID.
- In the Enter the OTP sent to your email address box, enter the OTP sent to your email ID. Click Resend OTP if you want to receive the OTP again.
- In the Enter your new password box, enter the new password that you want to use from here on. In the Confirm Password box, re-enter the new password.
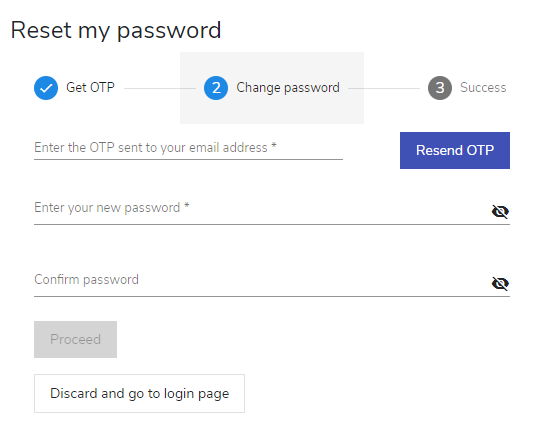
Fig. 3.53 Get OTP
- Click Proceed.
- When your password is updated, a success message appears as shown below. Click reset again to repeat the password reset process (Steps 2-5). When you change the account password, you will receive a mail in the associated email id.
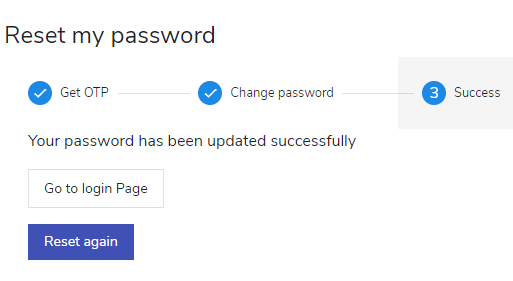
Fig. 3.54 Success message
Click Go to login Page button to sign into the User Management application by providing the credentials in the login page as shown below:
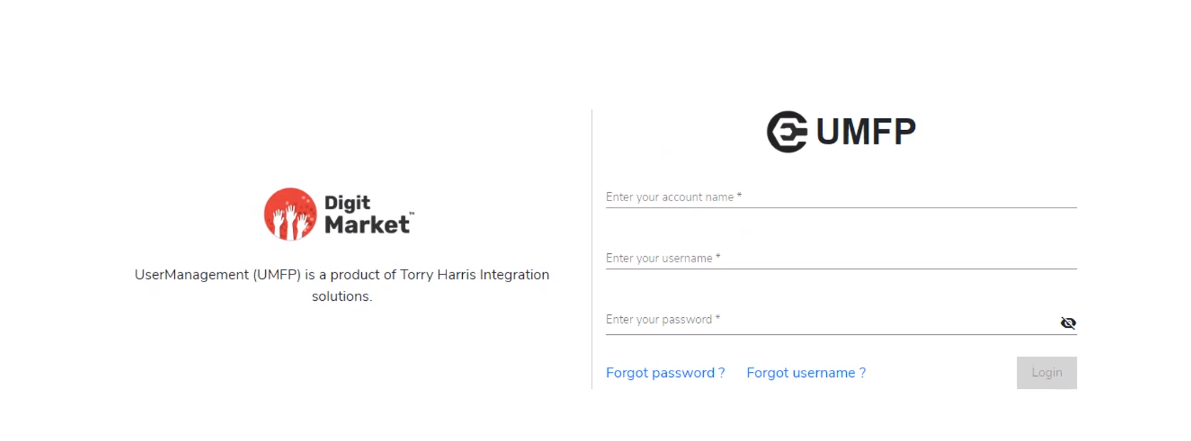
Fig. 3.55 Admin Login
On successful login the landing page will see the Admin Dashboard.
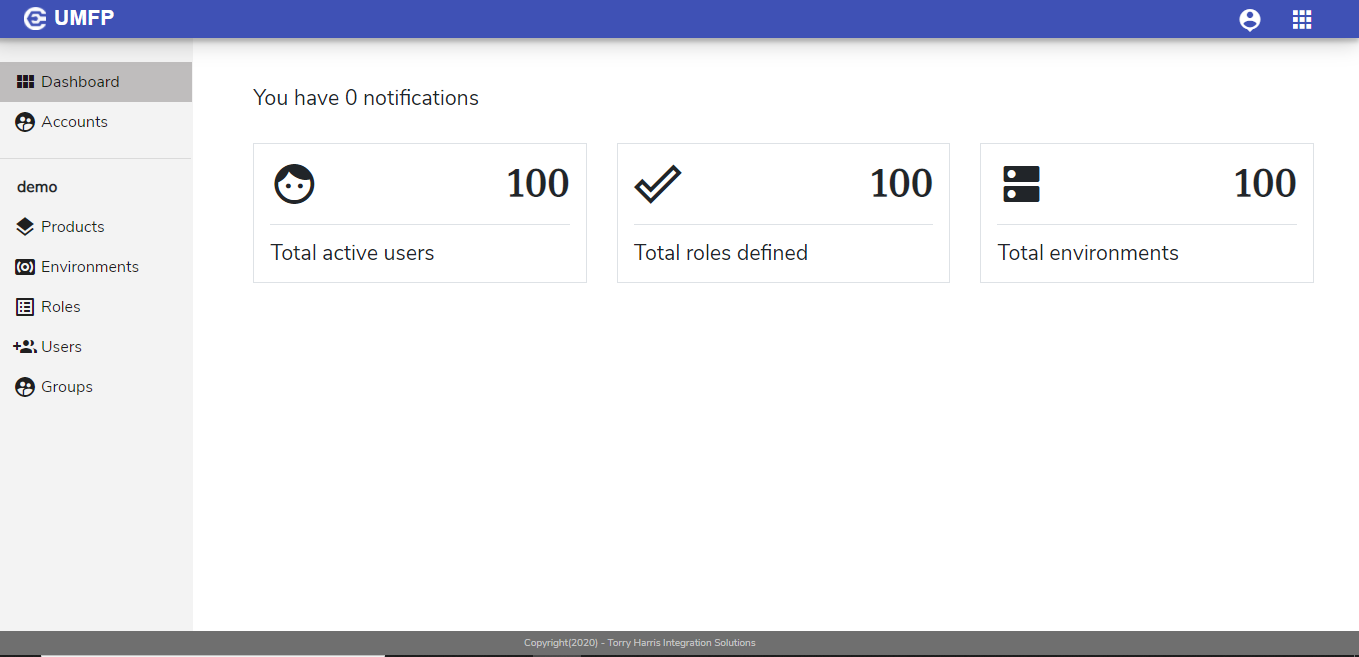
Fig. 3.56 Admin Dashboard
An Admin is basically a User who also has Admin privileges apart from certain product-related tasks. Admins can log into an application as both Admin and User, but only a single login will be provided to the Admin for both user types. When an Admin logs in with Admin credentials, they will see the Admin Dashboard. From this Admin Dashboard, the Admin will also be able to access the screen that has product-related activities.
3.3. Products
UMFP allows an Admin/User to register a product for a particular account. The product must be in the list of THIS suite of products. For example, Product P1 can be registered for Account A1 by admin Ad1. Product P2 can be registered for Account A2 by admin Ad2.
3.3.1. Create a Product
To create a product:
- On the left navigation panel, click Products to open
the Products list and then click the plus icon
 to
create a new product.
to
create a new product.
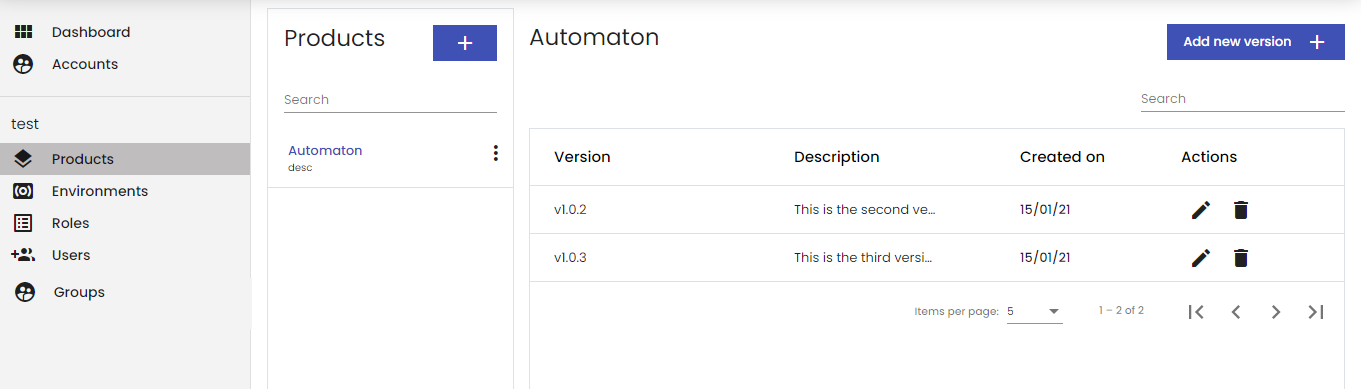
Fig. 3.57 Products
An Add new product window opens.
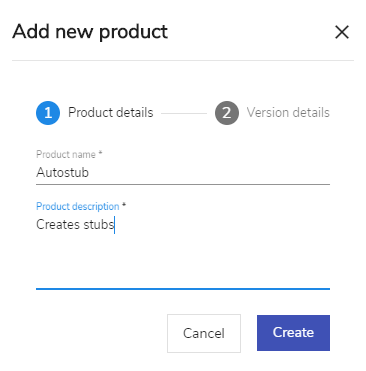
Fig. 3.58 Create Product
- In the Product name field, enter the product name.
- In Product description field, enter the description of the product you wish to register.
- Click Create. The product is created and you are navigated to the next tab. Once you create a product, you need to add version details. You can choose to add version details here or in the Create version screen.
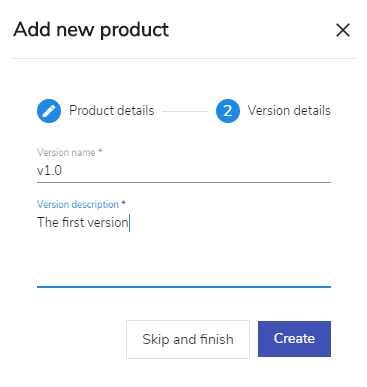
Fig. 3.59 Product Version
- Enter the Version name and Version description field, of the product version and click Create.
Each product displays details such as Version, Description, Created on and Actions.
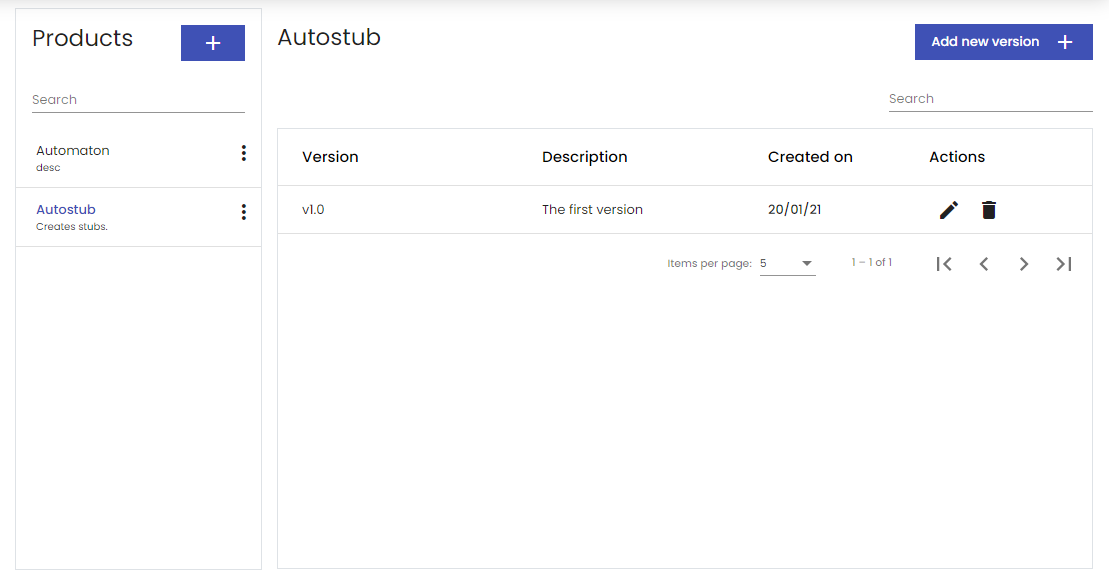
Fig. 3.60 Product
3.3.2. Edit a Product
To edit a product:
- Click on the hamburger menu
 of the required product and then
click Edit Product.
of the required product and then
click Edit Product.
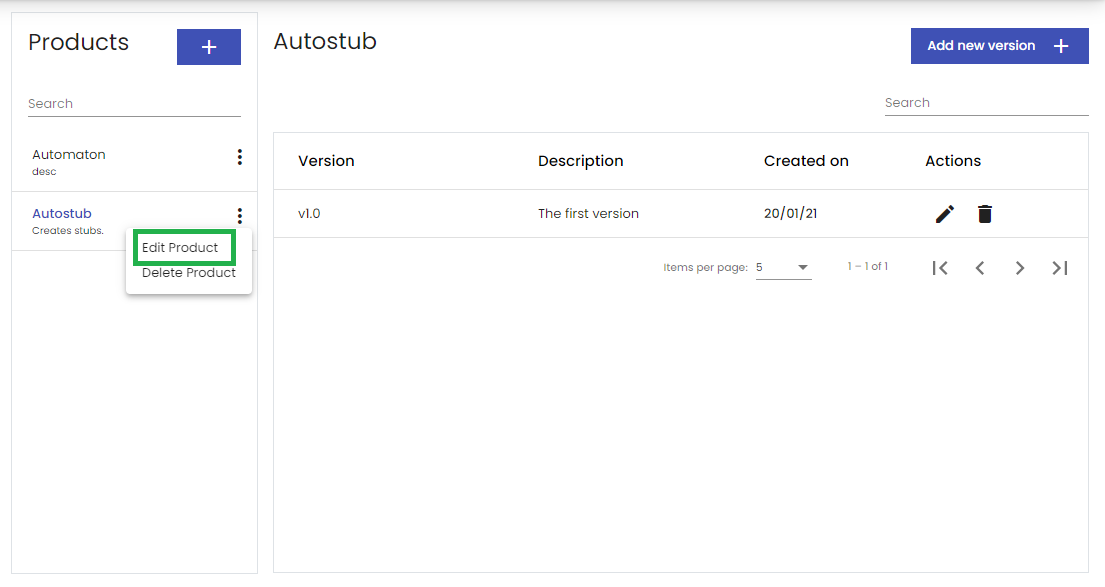
Fig. 3.61 Edit Product*
- On the Edit Product screen, make the necessary modifications to the product. You can update the changes for the product without affecting the environment it is hosted in.
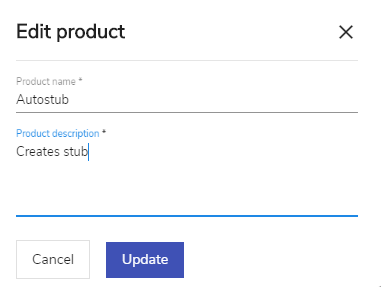
Fig. 3.62 Update
- Click Update to save the changes.
3.3.3. Delete a Product
The Admin/user who has the been assigned the capability to delete a product can perform the action.
To delete a product:
- Click on the hamburger menu of the required product and then
click Delete Product.

Fig. 3.63 Delete Product
- A confirmation message is displayed. Click Yes to delete the product.

Fig. 3.64 Delete Product
Note
You can delete a product if no environment is associated with that product.
If the product you are trying to delete is associated with an environment, a message displays as shown below.
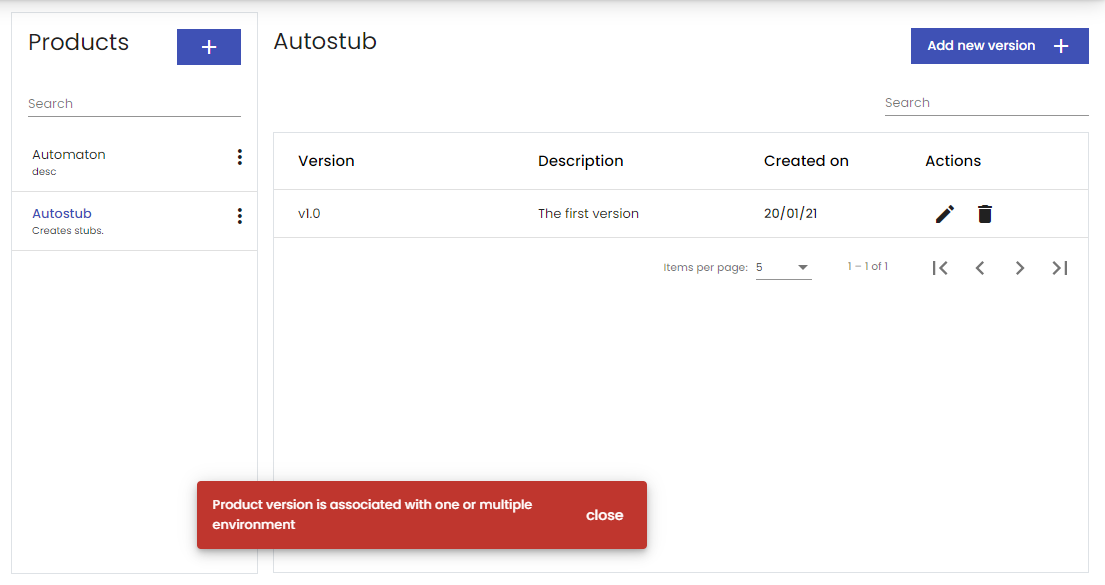
Fig. 3.65 Delete Product Warning
- Click Close to remove the message.
Dissociate the product and its version from an environment by selecting another product and version from the Edit Environment screen and then proceed to delete the product.
3.3.4. Product Version
UMFP allows the you to create different versions of the same product. Each version of the product can be hosted in a separate environment. For example, you can register a product named A and register its versions A1 and A2. A1 can be hosted in environment E1 and A2 can be hosted in environment E2. You can upgrade a product version to a newer version by updating the version name in the Edit version screen or by creating a newer version of that product in the Create version screen.
3.3.4.1. Create a Product Version
To create a product version:
- Click the name of the product you wish to add a version for and then click Add new version.
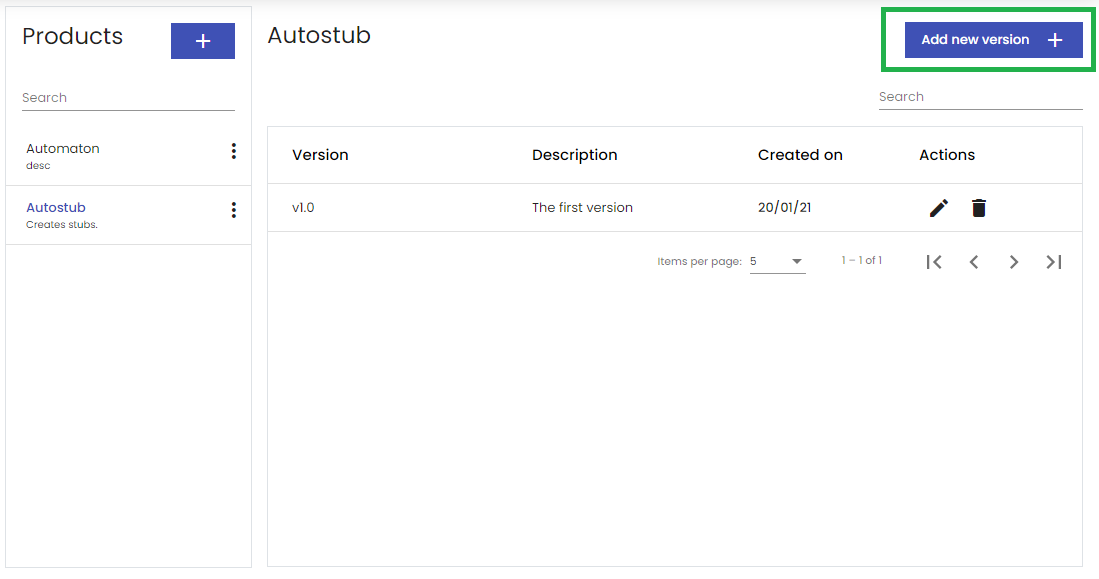
Fig. 3.66 Product Add version
A Create version window appears.
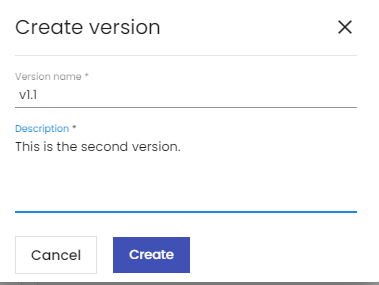
Fig. 3.67 Create version
- In the Version field, enter the version number.
- In Version description field, enter the description of the version.
- Click Create to create the version. The newly created version is added to the list of versions of that product.
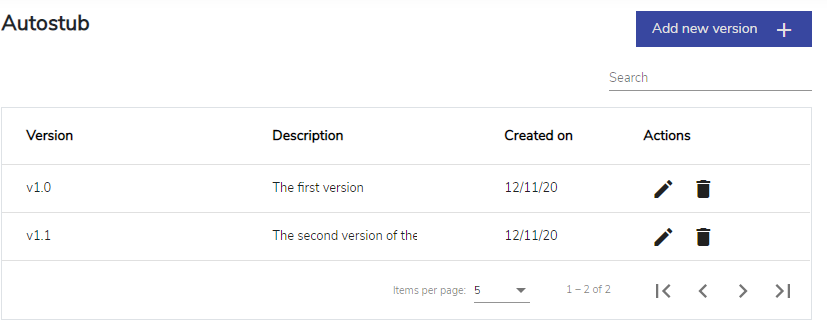
Fig. 3.68 Product version list
To search for a product version:
- Use the Search option to search for a product version from the list of versions.
- To search for a particular version from the list, type in search criteria like Version Name.
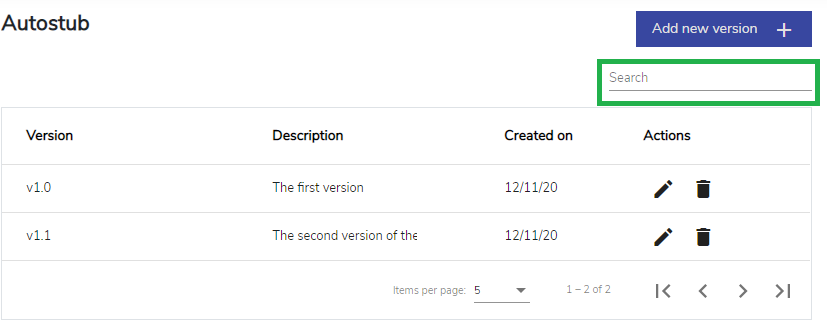
Fig. 3.69 Search Product Versions
3.3.4.2. Edit a Product Version
To edit a product version:
- Click the edit icon corresponding to the product version you
want to edit.
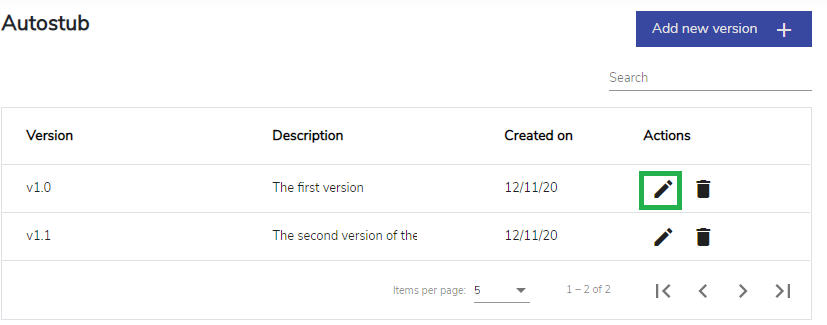
Fig. 3.70 Edit version
- The Edit Version screen is displayed. Make the necessary modifications to the product version. You can update the changes for the product version without affecting the environment it is hosted in.
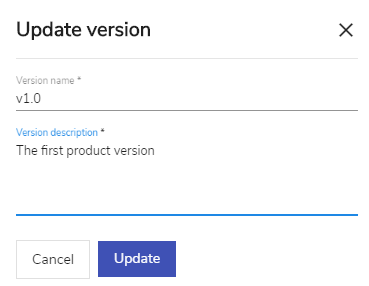
Fig. 3.71 Edit version
- Click Update to save the changes.
3.3.4.3. Delete a Product Version
The Admin/user who has the been assigned the capability to delete a product version can perform the action.
To delete a product version:
- Click the delete icon corresponding to product version you
want to delete.
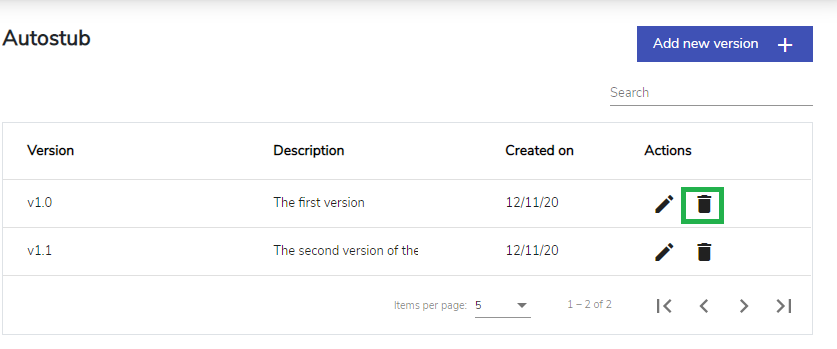
Fig. 3.72 Delete product version
- A confirmation message is displayed. Click Yes to delete the product version.
Fig. 3.73 Delete Product
Note
You can delete a product version if no environment is associated with the product version.
If the product version you are trying to delete is associated with an environment, a message displays as shown below.
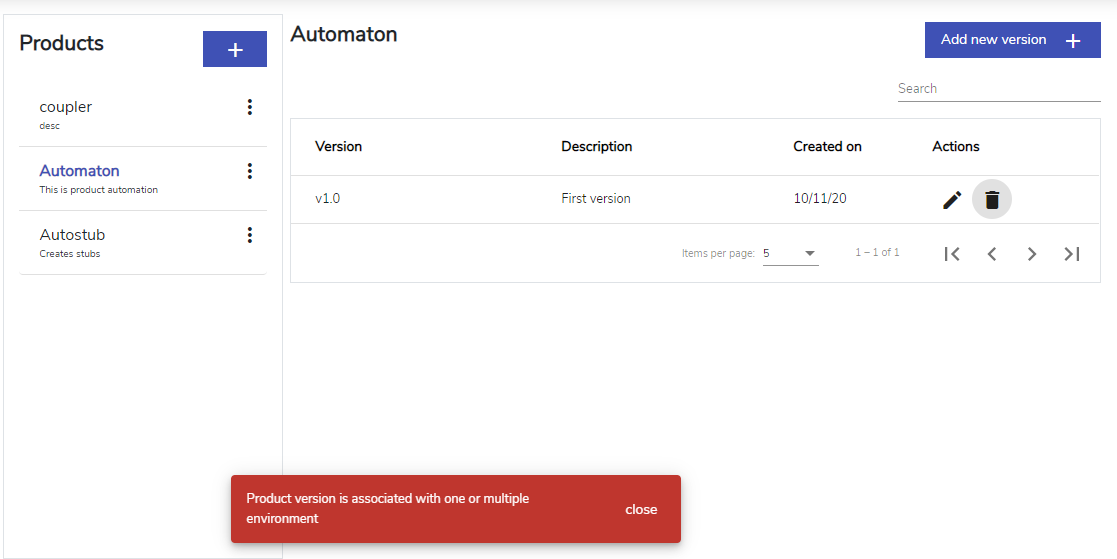
Fig. 3.74 Delete product version message
- Click Close to remove the message.
Dissociate the product and its version from an environment by selecting another product and version from the Edit Environment screen and then proceed to delete the product version.
3.4. Environments
Environments are instances where the product is deployed. User management allows its users to install their products within various environments, and also easily switch between environments.
Each environment is tagged with a role. If a user has access to more than one environment, the role that is specific to the environment in which the user is currently accessing will be activated.
Every product is associated with an environment where it is hosted. A role can comprise of capabilities that span across multiple products, hosted in separate environments.
For example: Capability C1 is defined for Environment E1 hosting Product P1. Capability C2 is defined for Environment E2 hosting Product P2. Role R1 is a combination of capabilities C1 and C2.
Note
Environments can be mapped to sub-accounts.
3.4.1. Create an Environment
To create an environment:
On the left navigation panel, click Environment and then click Create a new environment.
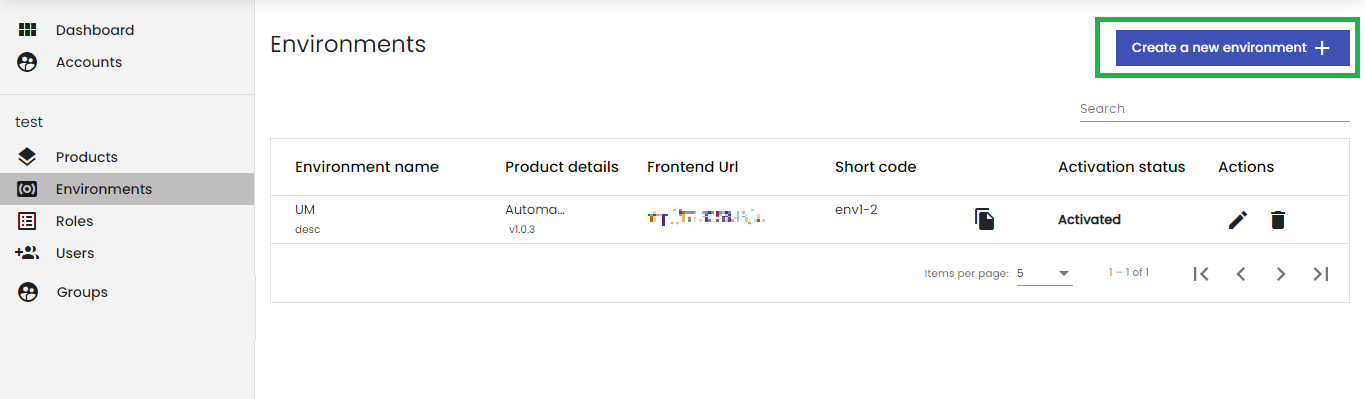
Fig. 3.75 Environment
The Register a new environment screen is displayed. On the Register a new environment screen, enter the following details:
- Environment name
- Environment Description
- Product
- Version
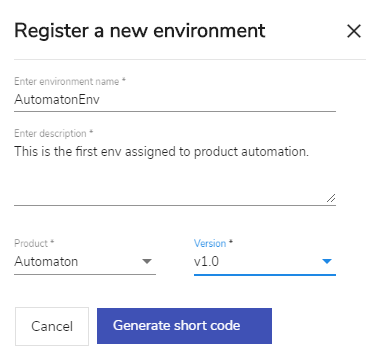
Fig. 3.76 Environment
Note
Product and its version must be created previously for it to appear in the list.
- Click Generate short code to complete the environment creation process and generate the short code. Short code is unique across an account.
The newly created environment is added to the list of environments on the Environments screen. The Environments screen displays details such as Environment Name, Product details, Frontend Url, Short code, Activation status and Actions for each environment. As an Admin, you can update or delete created environments using the update or delete ![]() icons respectively.
icons respectively.
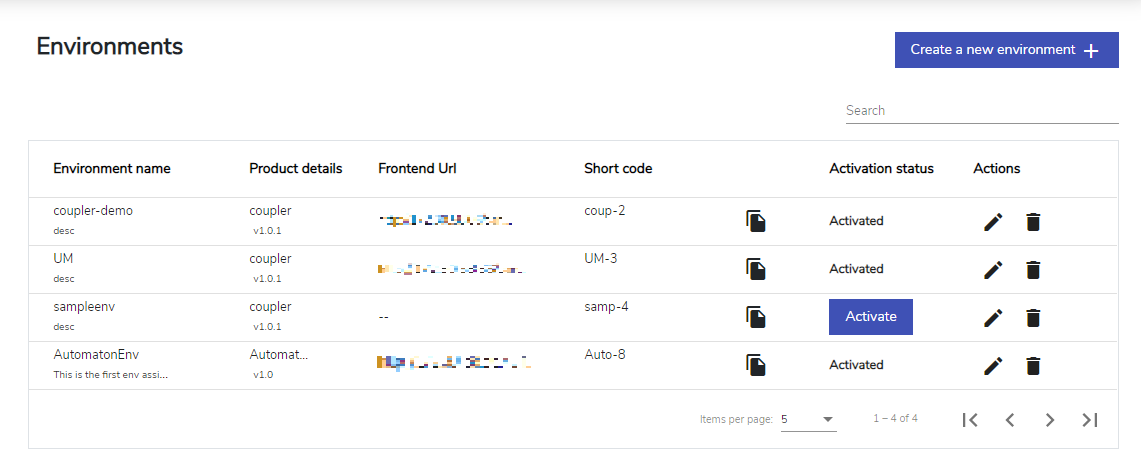
Fig. 3.77 Environment
To search for an environment:
Use the Search option to search for an environment from the list of environments.
To search for a particular environment from the list, type in search criteria like Environment Name/ Short Code.
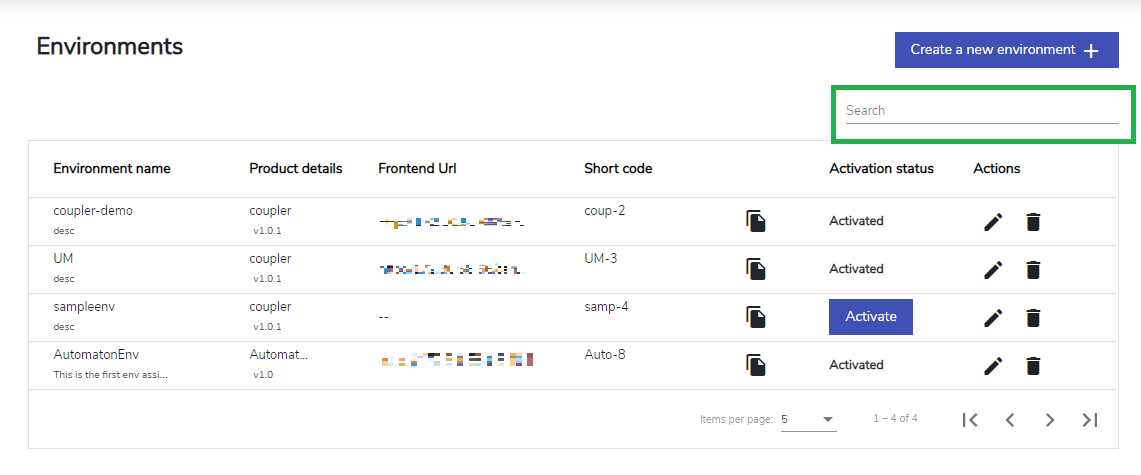
Fig. 3.78 Search Environment
3.4.2. Activate an Environment
- To activate an environment, click Activate to open the Activate environment screen.
- Populate the required details such as:
Frontend url - Value of the url of the environment.
Capability path - URL to get the capabilities from the backend of the particular product.
- Environment details - Based on the capability path, all the keys will be populated. Value must be entered by the user.
- Backend Port - The port on which the services of the product are hosted.
- Backend Ip - Ip of the host on which the services of the product are hosted.
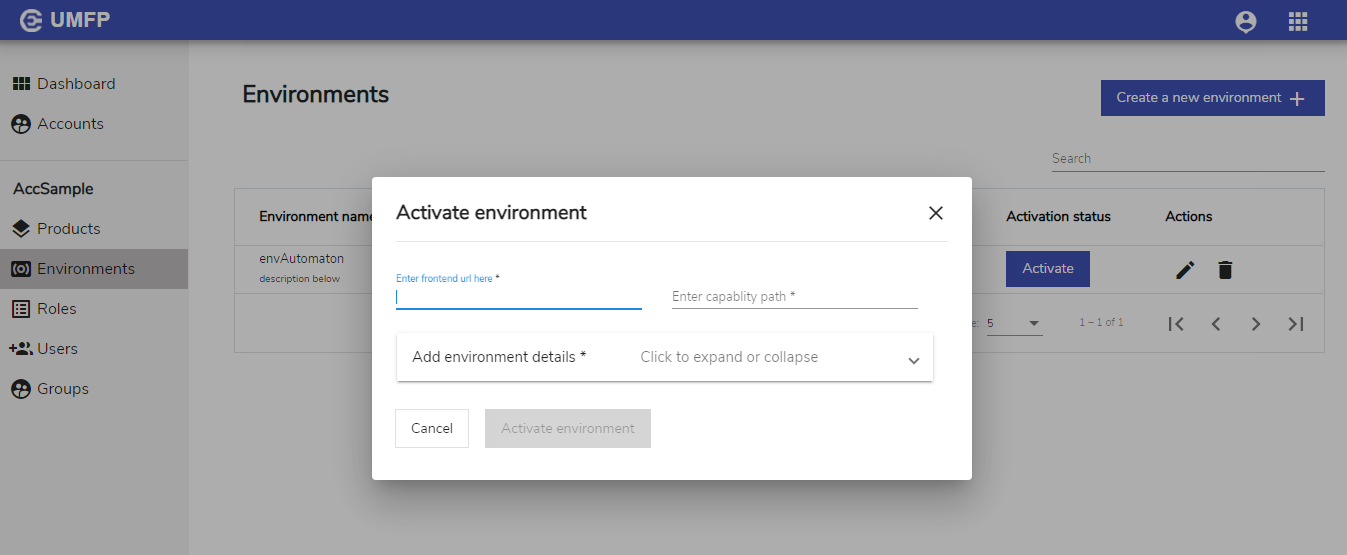
Fig. 3.79 Activate Environment
User must proide all the details to actiate as shown below:
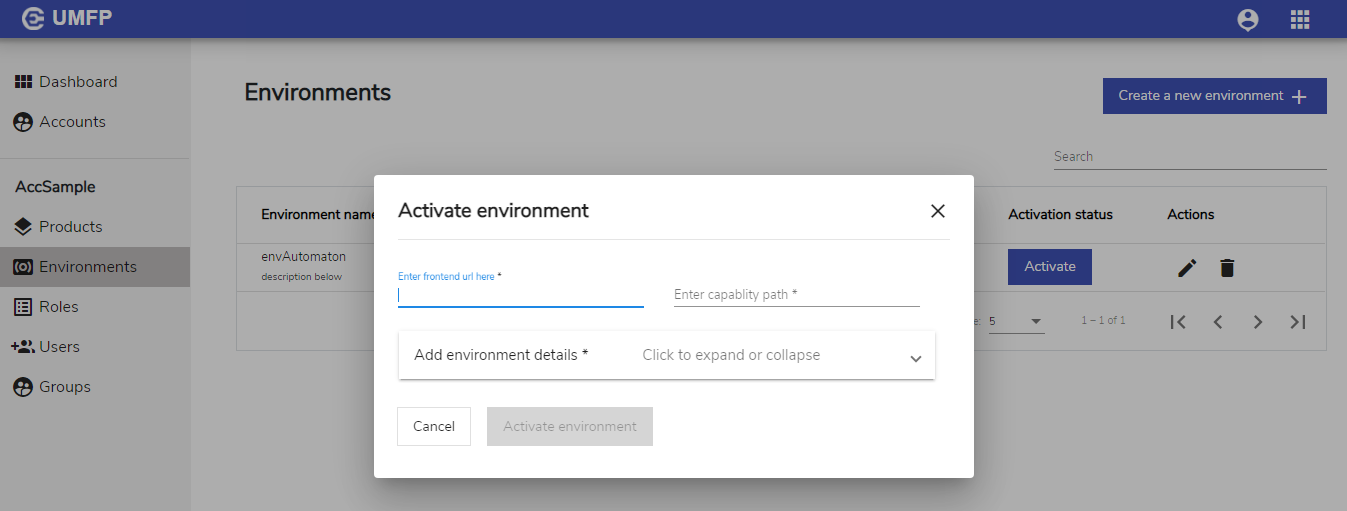
Fig. 3.80 Activate Environment
Click Activate environment to register the URL for the environment and a success message will be displayed as shown below:
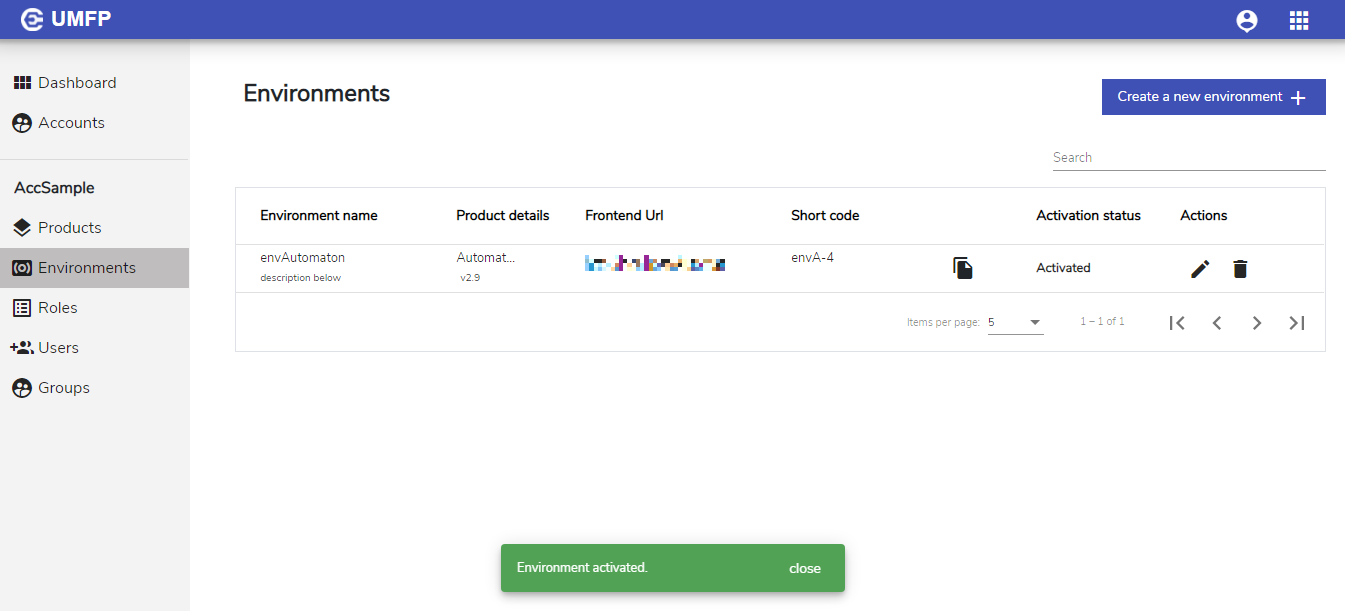
Fig. 3.81 Environment Activated
Once the environment is activated successfully, users must stop the server. Once the server is stopped user must navigate to Automaton and paste the short code (copied from the Environment creation page) in the config file and start the server.
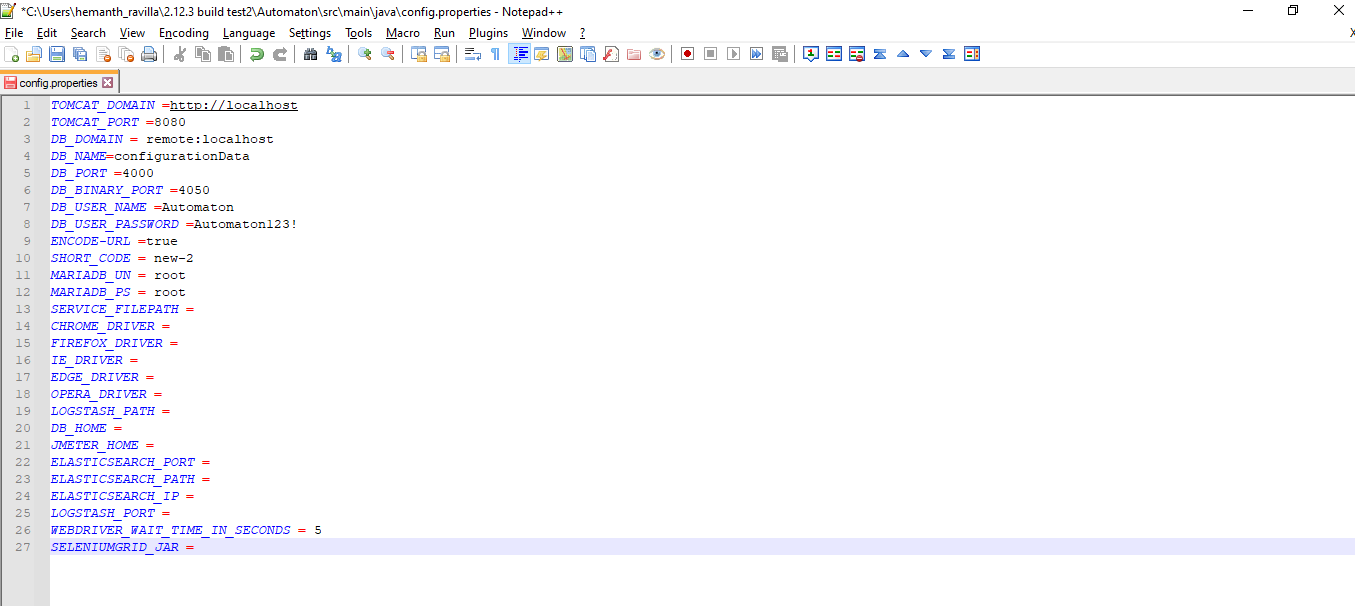
Fig. 3.82 Config Files
3.4.3. Edit an Environment
To edit a environment:
Click the edit icon
corresponding to the environment you want to edit to open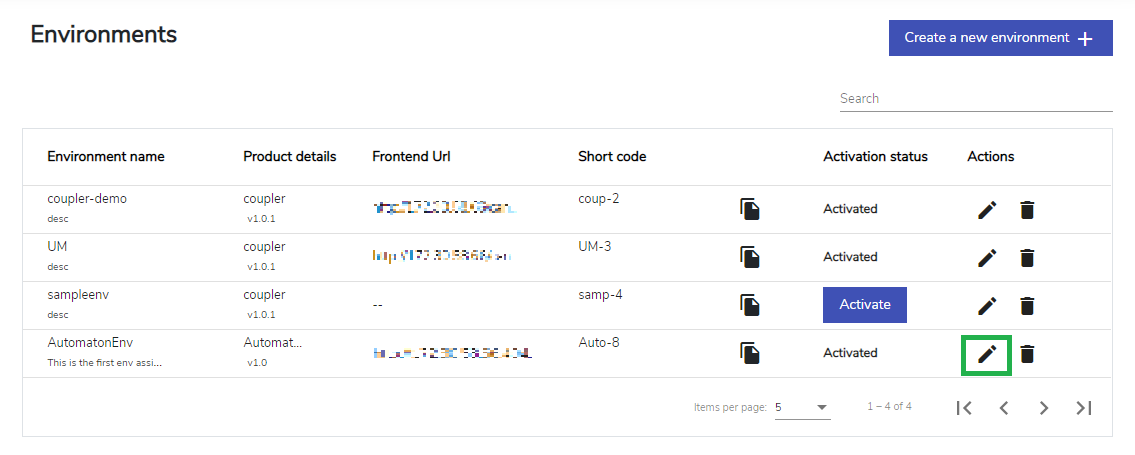
Fig. 3.83 Update Environment
The Edit Environment screen is displayed. Make the necessary modifications to the environment. You can dissociate a product version from the environment by selecting another version from the Version drop-down.
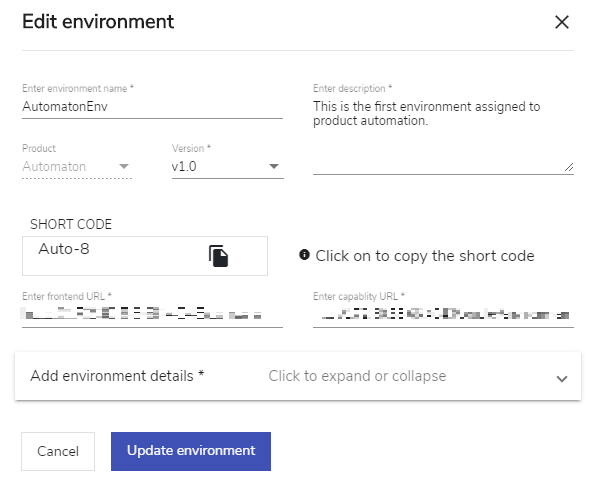
Fig. 3.84 Update Environment
Click Update Environment to save the changes.
3.4.4. Delete an Environment
To delete a environment:
Click the delete icon
corresponding to environment you wish to delete.
Fig. 3.85 Delete Environment
A confirmation message displays asking you to confirm your action. Click Yes to delete the environment.

Fig. 3.86 Delete Environment
Note
Only Admins can create/edit/delete environment.
3.5. Roles
Role is a collection of capabilities that are required to govern user’s actions. Capabilities are specific functionalities that can be assigned based on application. Capabilities comprise of user-management-specific activities as well as application-specific activities. User management-specific activities are generic functionalities that is common across all the product application, irrespective of the environment.
Every product is associated with an environment where it is hosted. A role can comprise of capabilities that span across multiple products, hosted in separate environments. If a user has access to more than one environment, the capability that is specific to the environment in which the user is currently accessing will be activated. Thus, for a user with a role that has capabilities from two different products, capability specific to one product will not be applicable to another product.
Note
- Roles are mapped at account level and not sub-account level.
- Roles mapped at account level will by default be applicable to the sub-account.
3.5.1. Create a Role
To create a role:
- On the left navigation panel, click Roles to open the Roles list and then click the plus icon
 to create a new role.
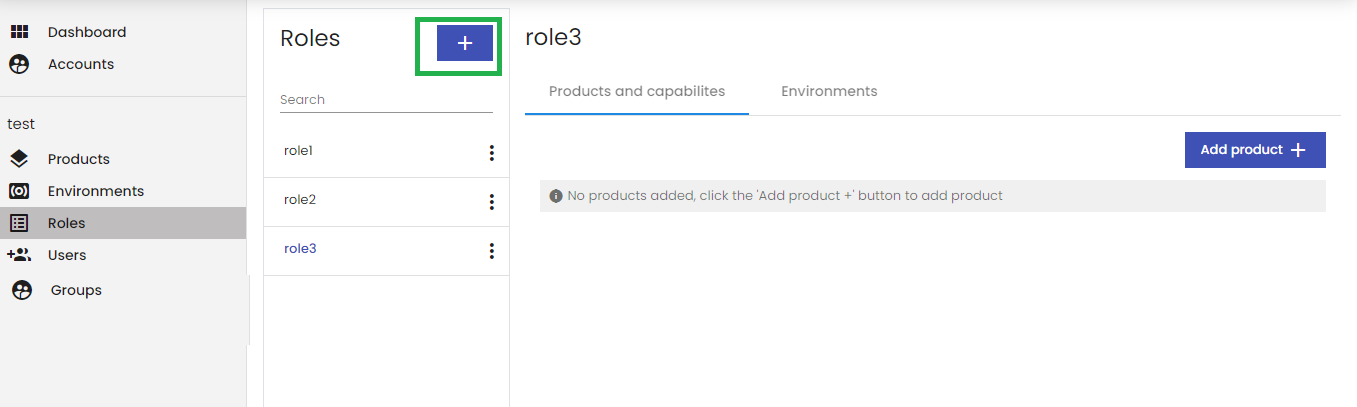
Fig. 3.87 Roles
A Create role screen is displayed.
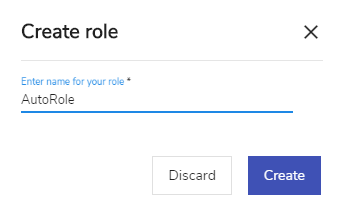
Fig. 3.88 Create Role
- Enter the name for your role.
- Click Create to finish the role creation process. The role is created.
To add products and capabilities to a role:
- Click the name of the role you wish to add products and capabilities and then click Add product.
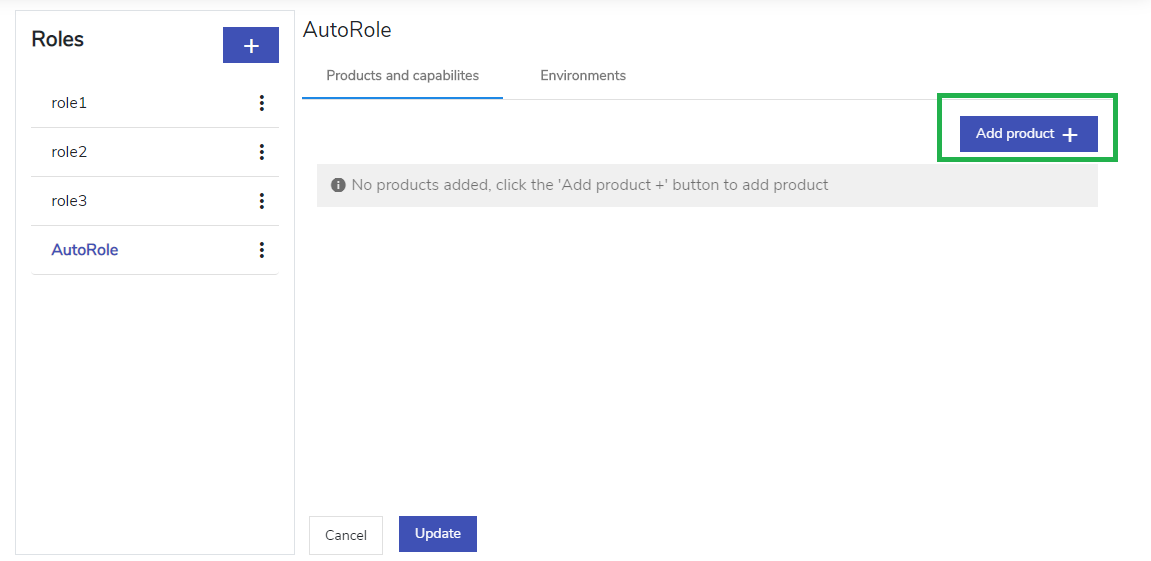
Fig. 3.89 Role Add Product
- From the Select product drop-down, choose one product among the list of products.
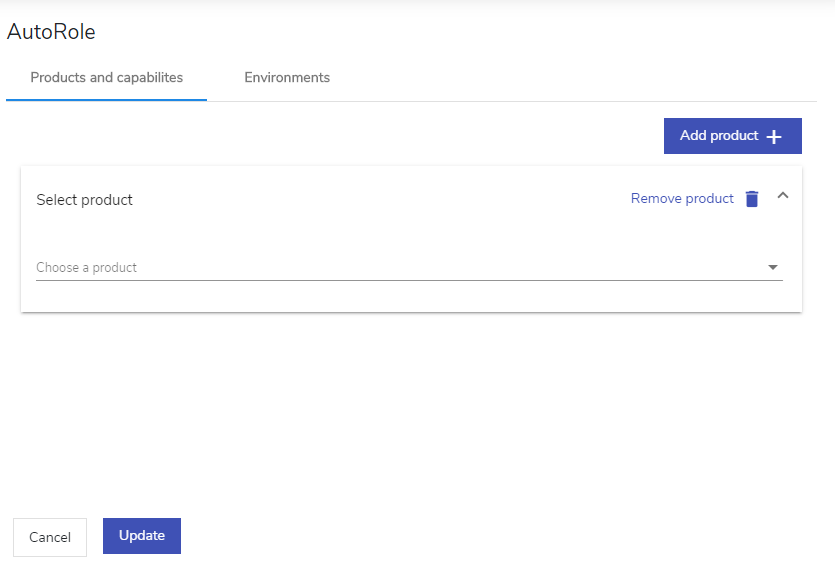
Fig. 3.90 Select Product
- Click the required check box to select the capabilities that are to be assigned to the role. You can dissociate a capability from the role by deselecting the check box corresponding to that capability. Click the Select all toggle button to select all capabilities at one go. Inversely, click the Select all toggle button again to deselect all capabilities at one go.
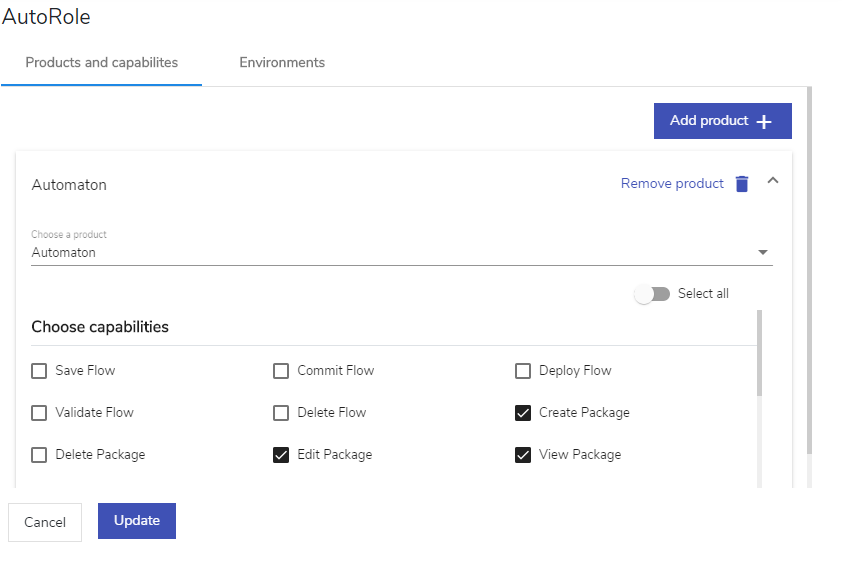
Fig. 3.91 Product Capabilities
- Click Update. The product and capabilities are added.
- Click Add product to add more products or click Remove product to delete the existing product from the role.
Similarly for a particular role, you can add capabilities for User Management as well. Follow the steps 1 to 4 listed above.
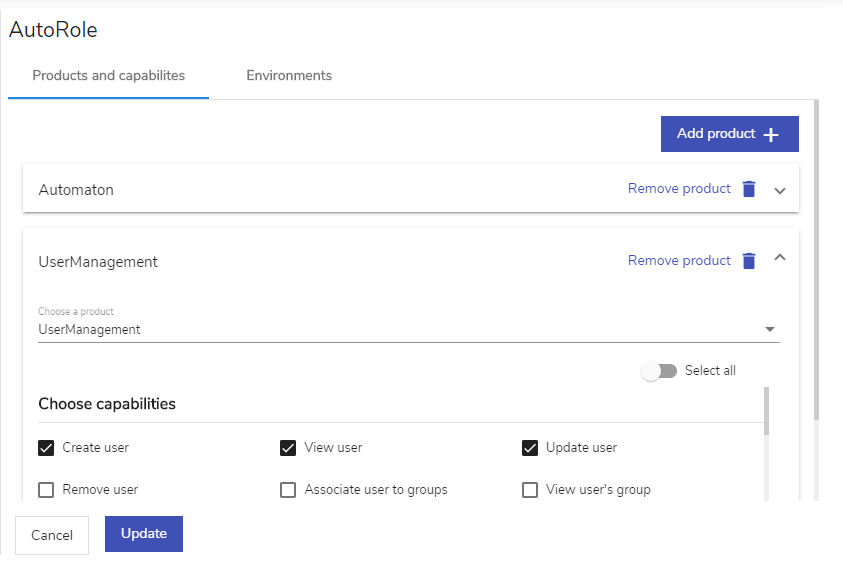
Fig. 3.92 User Management Capabilities
Based on the product capability assigned to him, user can perform respective functionality in product environment and user management environment. User management-specific features can be enabled/disabled based on the capability of the user. Similarly product-specific features can be enabled/disabled based on the capability of the user. UMFP can be integrated with a third-party product. If UMFP is integrated with a product, user management capabilities associated with a user can be exposed to that product as an API. This API can be consumed by the product to achieve user management functionalities within that product.
3.5.2. Associate a Role to Environment
As of now, you must have created a role. The Role can be exercised by associating it with environment(s).
To associate a role to an environment:
- On the Roles screen, under the Environments tab, environments created at the account level is displayed.
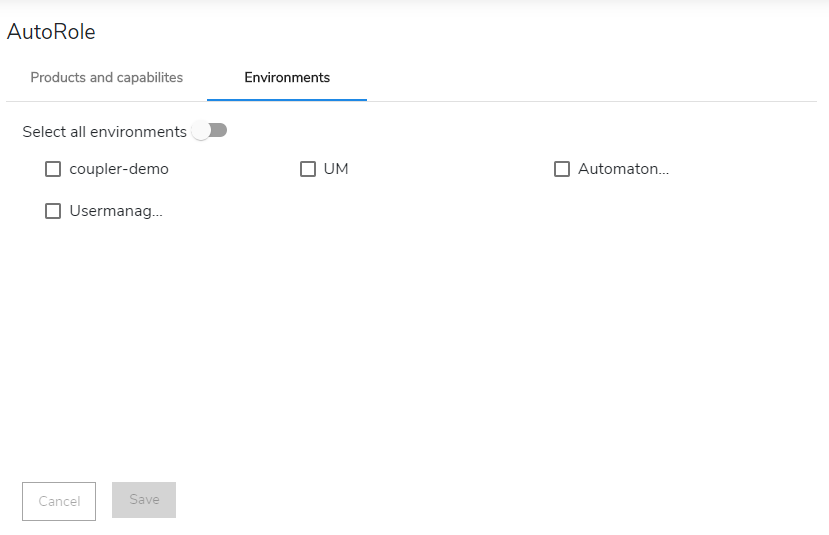
Fig. 3.93 Associate environment
- Click the required check box to select the environments to be mapped to the role. You can dissociate an environment from the role by deselecting the check box corresponding to that environment. Click the Select all environments toggle button to select all environments at one go. Inversely, click the Select all environments toggle button again to deselect all environments at one go.
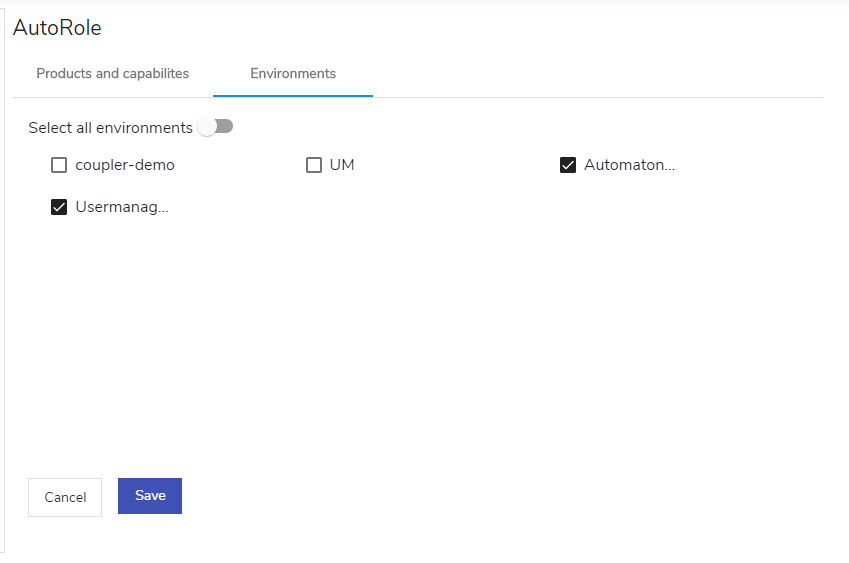
Fig. 3.94 Associate environment
- Click Save. The environment association is successful.
3.5.3. Edit a Role
To edit a role:
- Click on the hamburger menu
 of the required role and then click Edit Role.
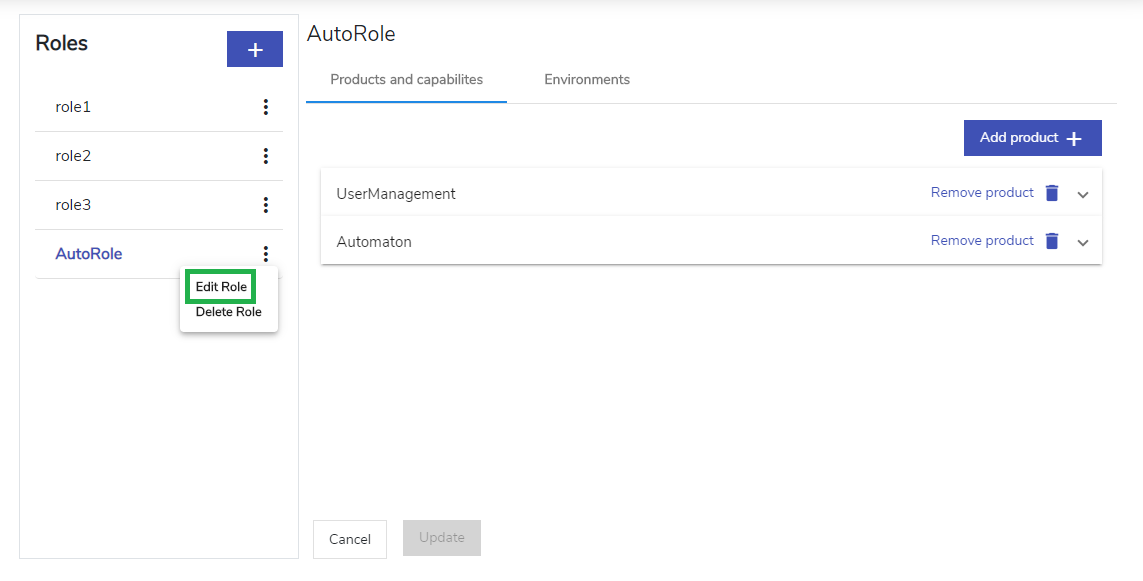
Fig. 3.95 Edit Role
- On the Edit Role screen, make the necessary modifications to the role name.
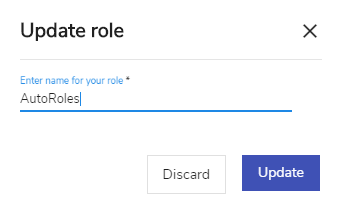
Fig. 3.96 Update
- Click Update to save the changes.
3.5.4. Delete a Role
To delete a role:
- Click on the hamburger menu of the required role and then click Delete Role.
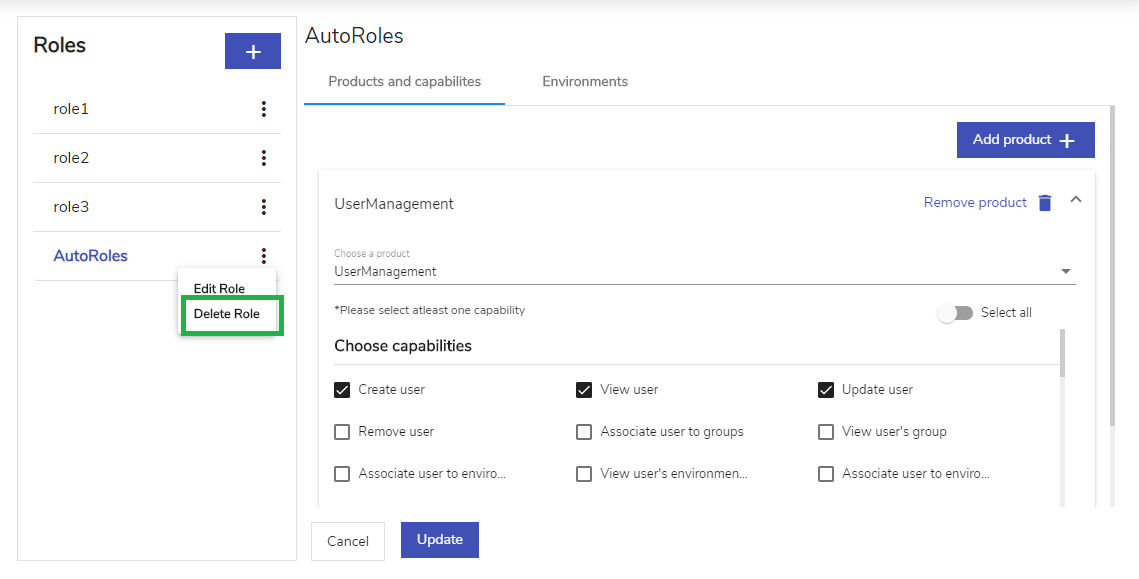
Fig. 3.97 Delete Role
- A confirmation message is displayed. Click Yes to delete the role.

Fig. 3.98 Delete Product
Note
You can delete a role if no environment is associated to that role.
If a role you are trying to delete is associated to an environment, a message displays as shown below.
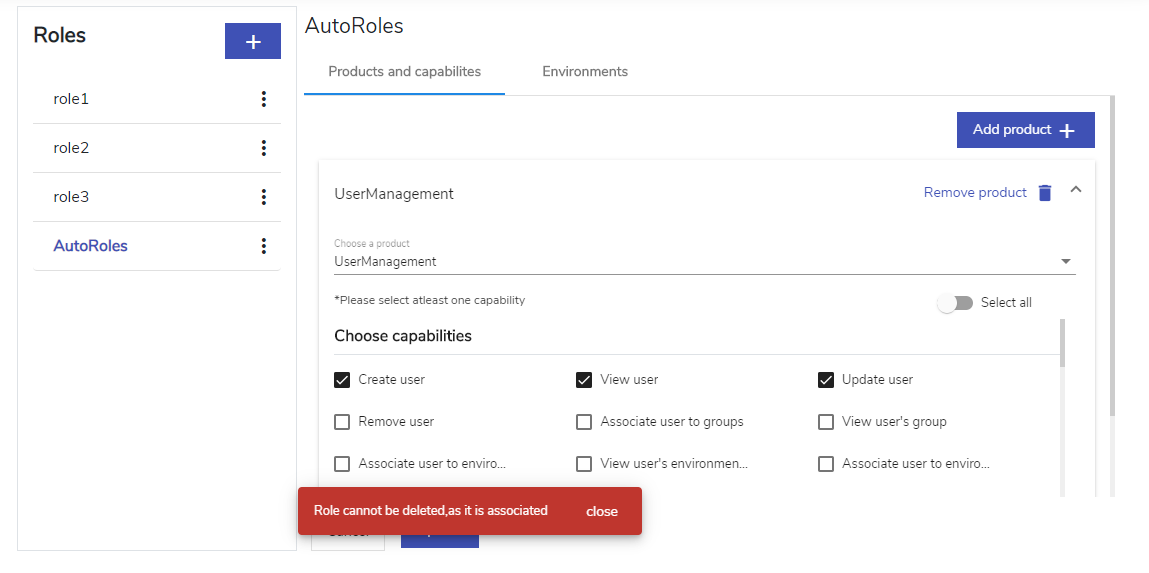
Fig. 3.99 Delete role warning
- Click Close to remove the message.
Dissociate an environment from the role by deselecting the check box corresponding to the environment under the Environments tab and then proceed to delete the role.
3.6. Users
Users are individuals who are given access to a product application and its features, to perform product-related activities. Users module allows Admins to create multiple users under a single account. Each user can be assigned to roles, groups and environments. Certain functionalities of a product can be granted/restricted to users based on the capabilities assigned to them.
Note
Users are mapped at account level and not sub-account level.
3.6.1. Create User
To create a user:
- On the left navigation panel, click Users the Users dialog will be displayed with all users and its details then click the Create a new user button to create a new user.
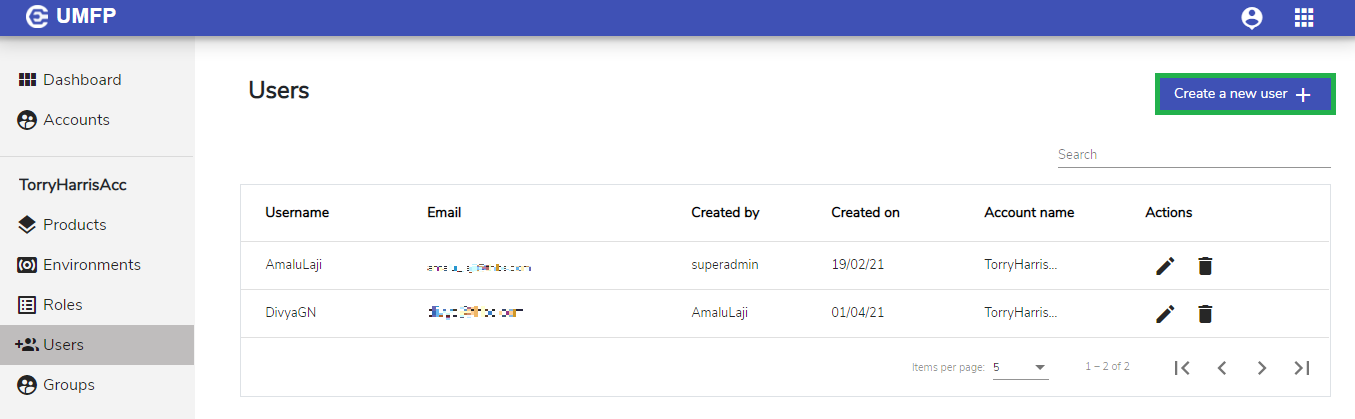
Fig. 3.100 Users
- The Create User screen is displayed. On the Create User screen, fill the mandatory details such as:
- First name
- Last name
- Username
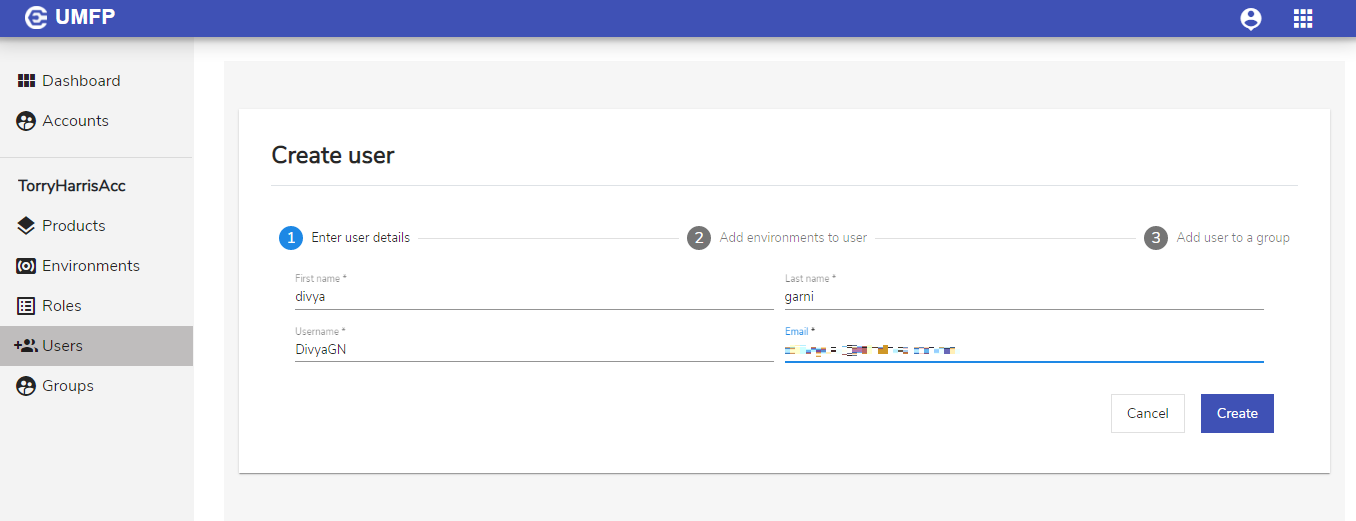
Fig. 3.101 Create User
- Click Create. After creating a user, a success message will be displayes as shown below:.

Fig. 3.102 Create User – User Details
Under the Environments tab, click the Add environment to user to add an environment.
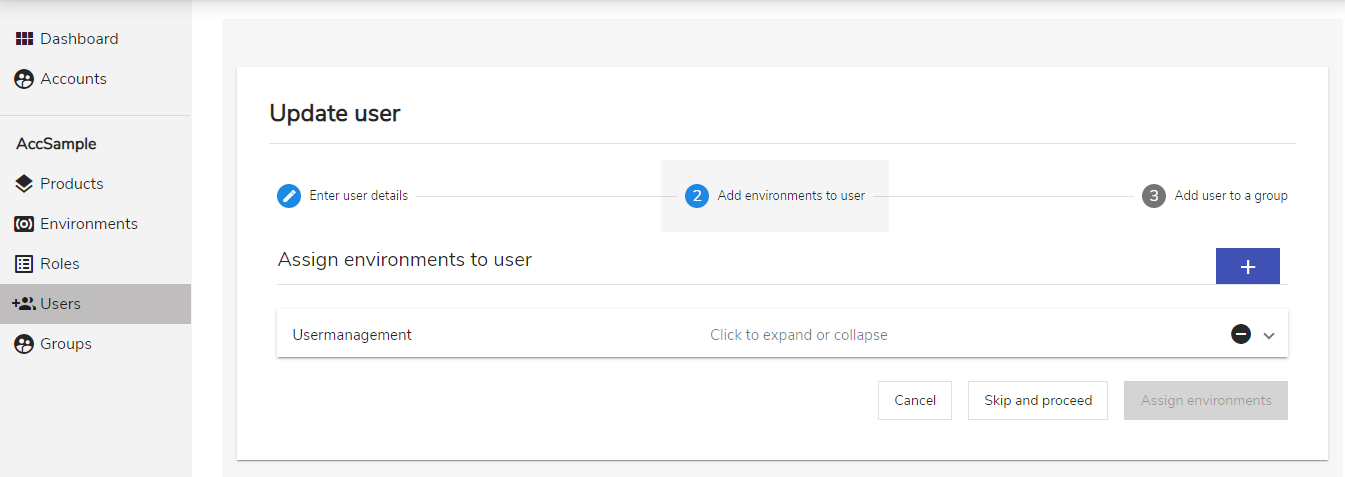
Fig. 3.103 Add Environment
Note
User Management environment will be there by default.
Users can also add Environment by clicking the plus icon as shown below:
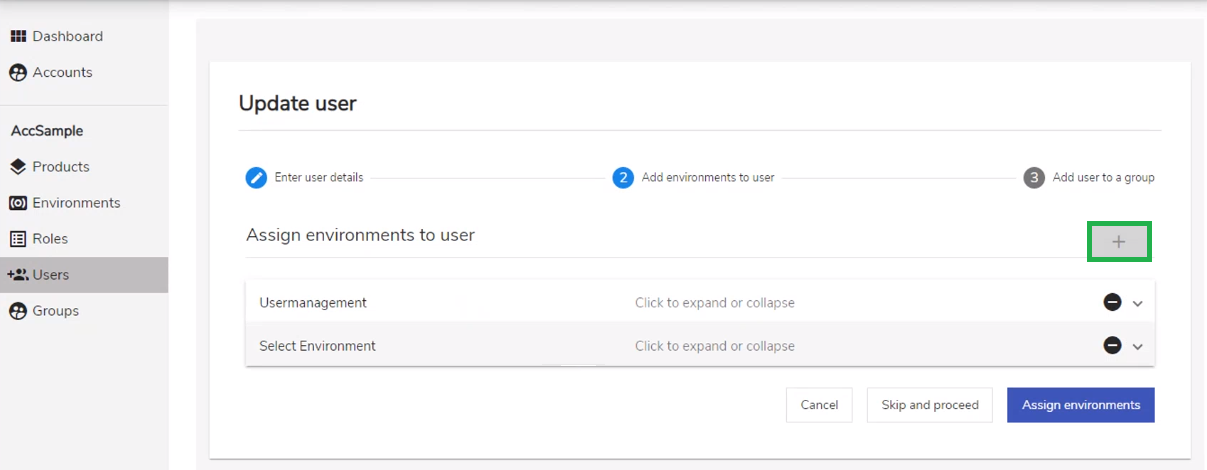
Fig. 3.104 Assign Environment
Users can click on the Select Environment where it will display all the previously created environments.
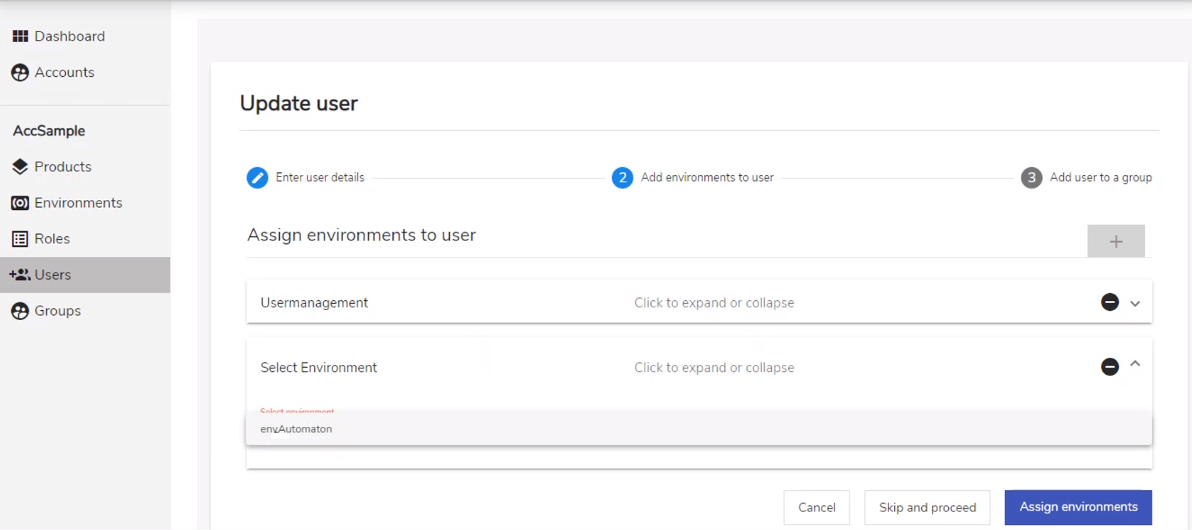
Fig. 3.105 Select Environment
Note
Once you select the environment, you need to associate roles to the environment. These roles will be valid only if the user is working in that particular environment
6. To choose roles for the selected environment, click the required check box to select the role type. Available options are displayed based on the environment roles created in the Create Roles screen.
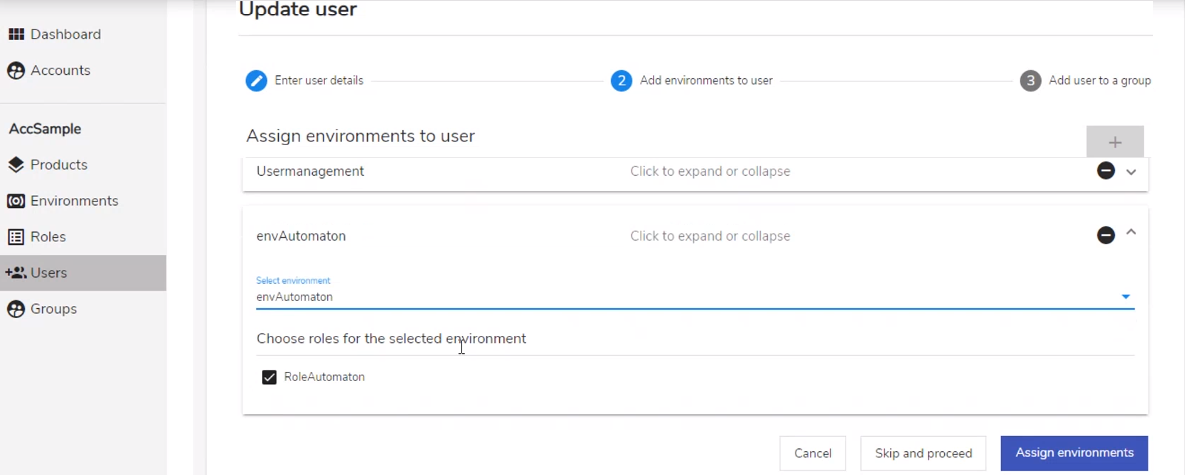
Fig. 3.106 Role Environment
- Click Assign Environment button to assign the envirnoments or Skip and Proceed to skip this step or Cancel to exit.
- Then users can add to a group if any else click here to see the steps to add users to group.
Click the tile menu next to the user menu icon to list all the environments for the logged-in user.
Fig. 3.107 Environment
Click on an environment to navigate to that particular Automaton Homepage.
3.6.2. Unlock a User
If a user attempts to login to their account using incorrect credentials multiple times, they are locked out of their account. Super Admin/ Admin will configure the number of incorrect login attempts in the password policy.
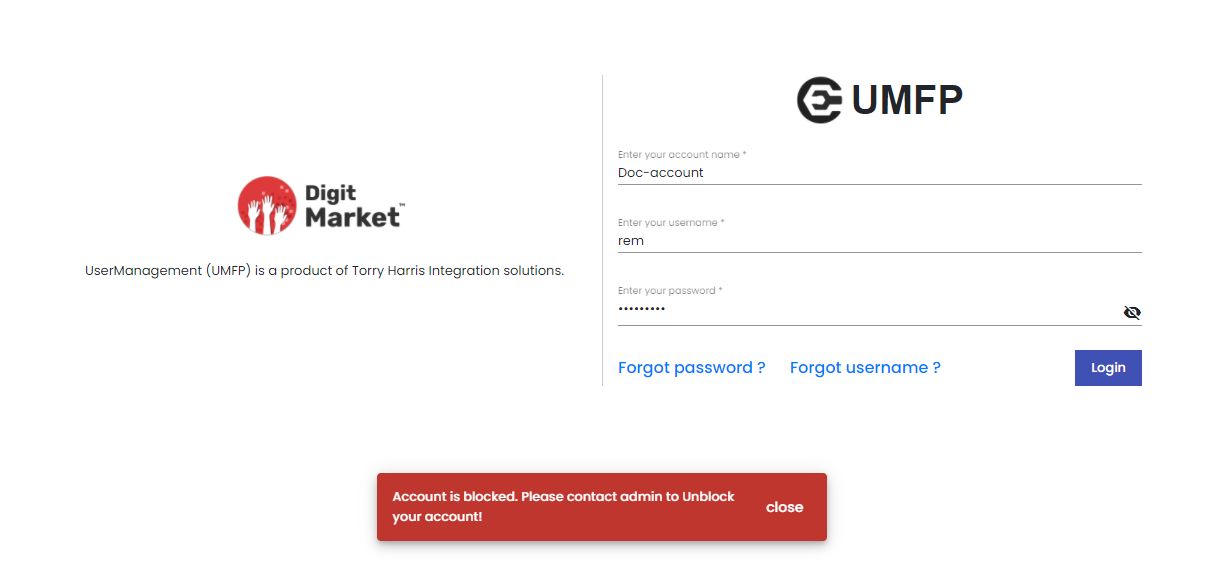
Fig. 3.108 Invalid Login
In such case, an Admin (or a User who has who has capability to unlock the account) can use the Unlock User feature to unlock the locked account.
To unlock a user account:
Click on the hamburger menu
of the locked user and click Unlock user.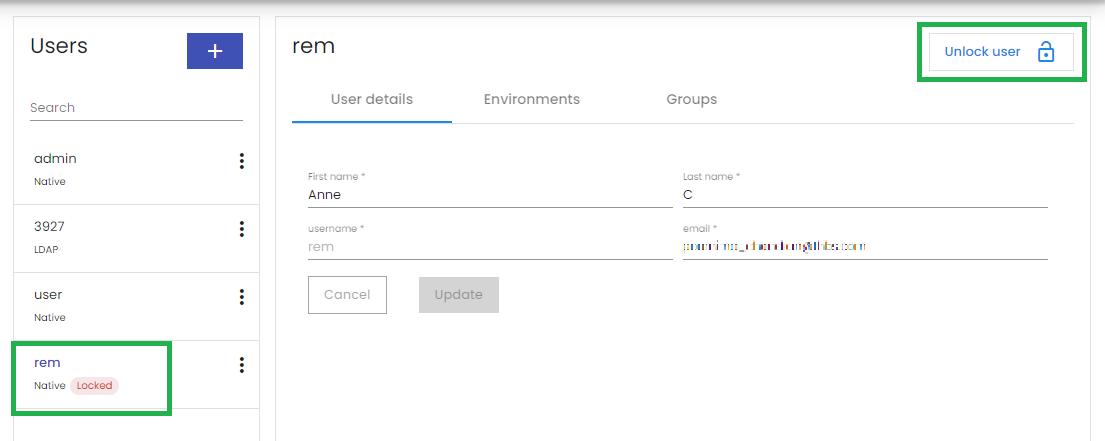
Fig. 3.109 Unlock User
A confirmation message displays asking you to confirm your action. Click Unlock to unlock the user.
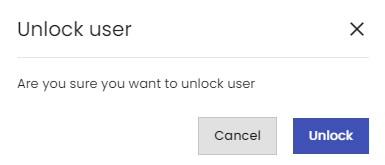
Fig. 3.110 Unlock User
The user account is unlocked successfully.
3.6.3. Edit a User
To edit a user:
Click on the edit icon
of the required user.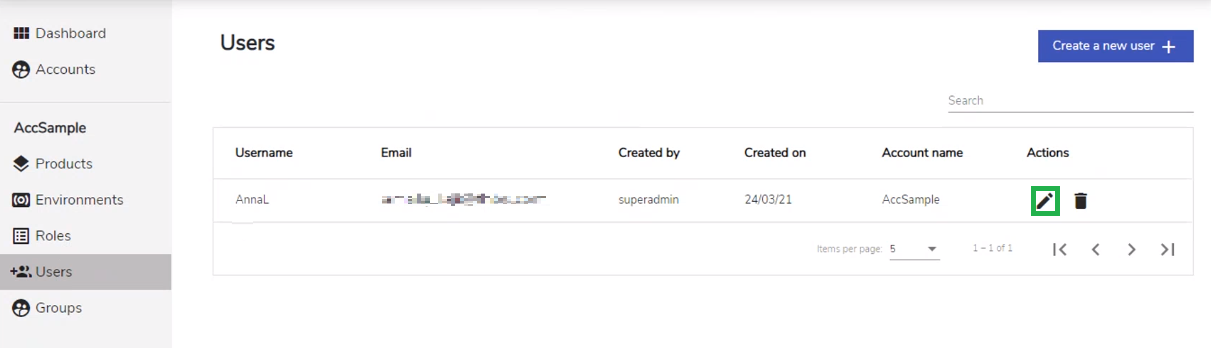
Fig. 3.111 Edit User
The Update user dialog will be displayed as shown below:
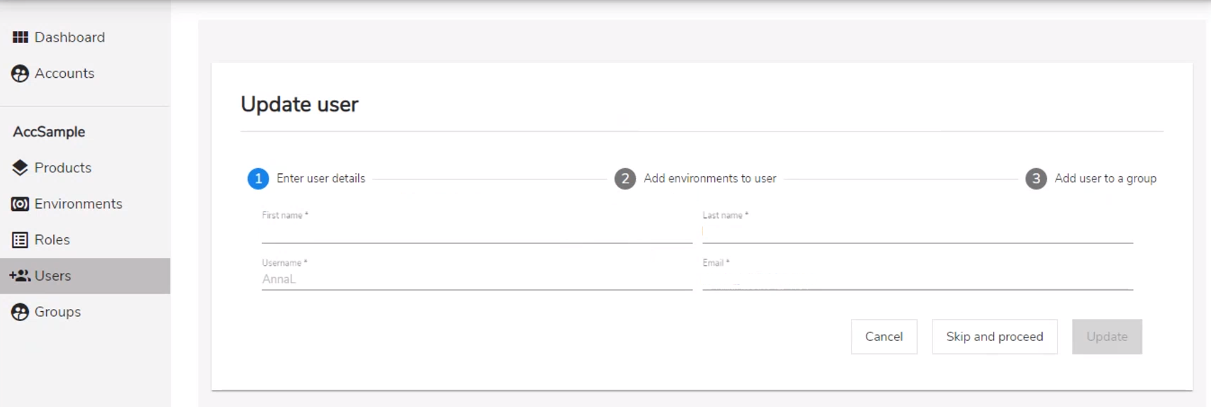
Fig. 3.112 Update User
Users can make the required modifications and click the Update button to update the details or Skip and Proceed to skip this step or Cancel to exit.
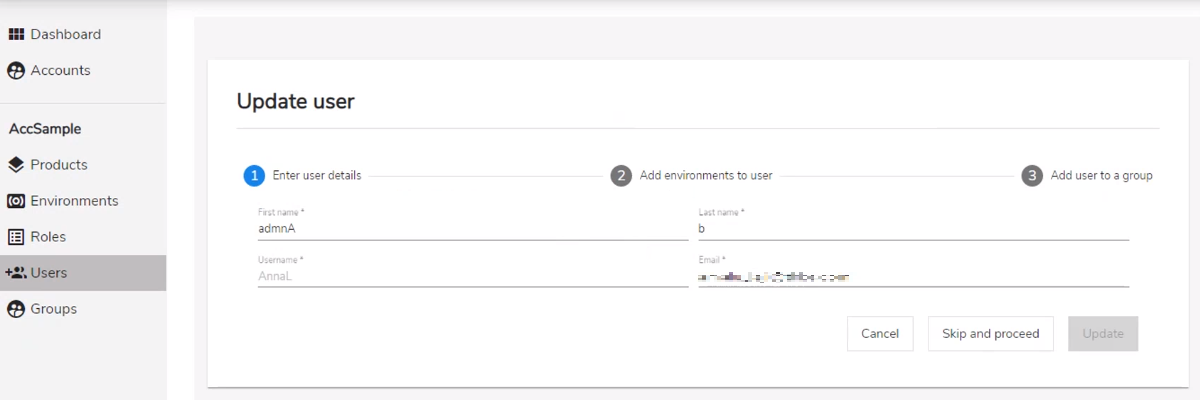
Fig. 3.113 Update User
Under the Environments tab, click the Add environment to user to add an environment.
Fig. 3.114 Add Environment
Note
User Management environment will be there by default.
Users can also add Environment by clicking the plus icon as shown below:
Fig. 3.115 Assign Environment
Users can click on the Select Environment where it will display all the previously created environments.
Fig. 3.116 Select Environment
Note
Once you select the environment, you need to associate roles to the environment. These roles will be valid only if the user is working in that particular environment
4. To choose roles for the selected environment, click the required check box to select the role type. Available options are displayed based on the environment roles created in the Create Roles screen.
Fig. 3.117 Role Environment
- Click Assign Environment button to assign the envirnoments or Skip and Proceed to skip this step or Cancel to exit.
- Then users can add to a group if any else click here to see the steps to add users to group.
Click the tile menu next to the user menu icon to list all the environments for the logged-in user.
Fig. 3.118 Environment
Click on an environment to navigate to that particular Automaton Homepage.
3.6.4. Delete a User
Admins or users with Admin rights can delete native or LDAP users.
To delete a user:
Click on the hamburger menu
of the required user and then click Delete.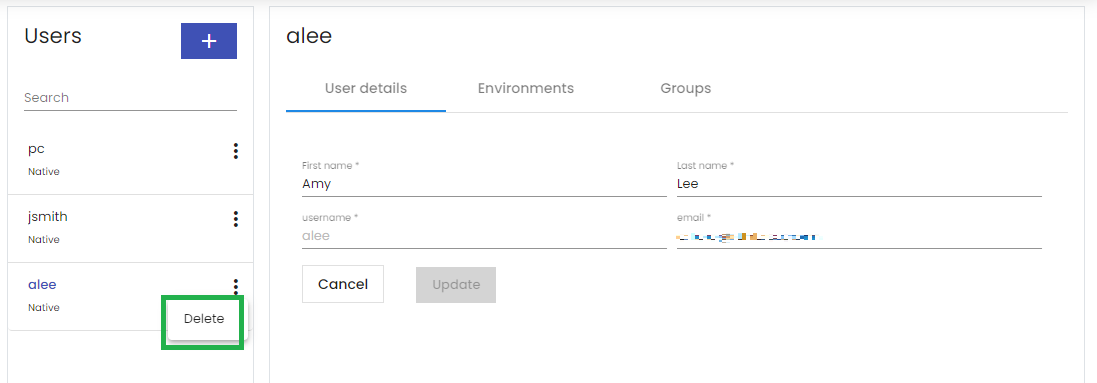
Fig. 3.119 Normal User
A confirmation message displays asking you to confirm your action. Click Yes to delete the user.
Fig. 3.120 Delete User
3.7. Groups
Groups are created to classify users with same capabilities and have access to the same environment, and by default the same product. All members of a group will be granted/denied permissions based on the role they have and can access the environments allocated to that group. In short, groups help to manage bulk users having the same responsibilities.
Sub-groups:
Sub-groups can be created that are subsets of the parent group. A user can be assigned to a sub-group, only if he/she is a part of the parent group. Users belonging to one sub-group can also be added to another sub-group, provided both sub-groups belong to the same parent group.
3.7.1. Create a Group
To create a group:
On the left navigation panel, click Groups and then click Create a new group.
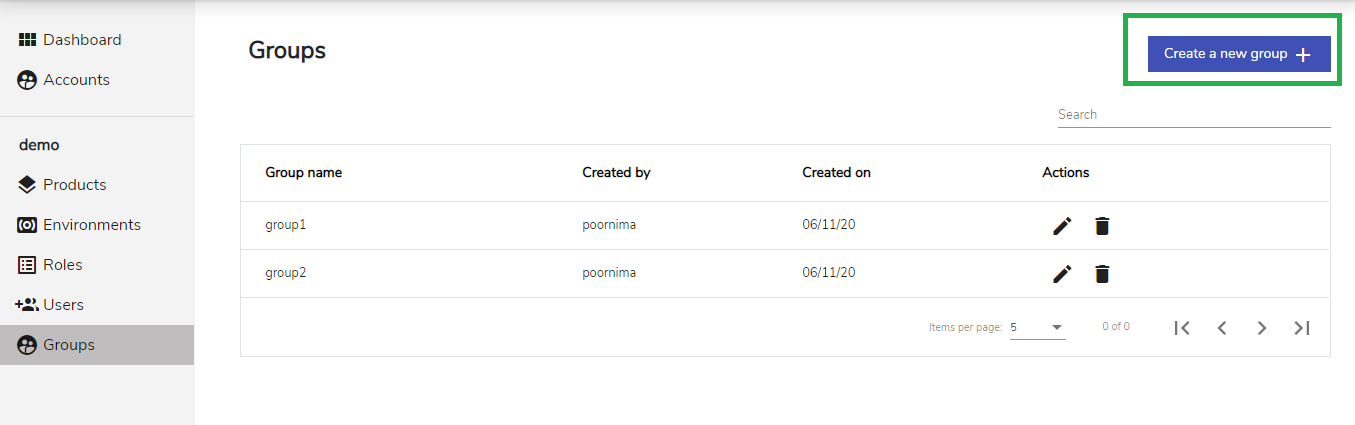
Fig. 3.121 Groups
The Create group screen is displayed. Under the Enter group details tab, enter the group name.
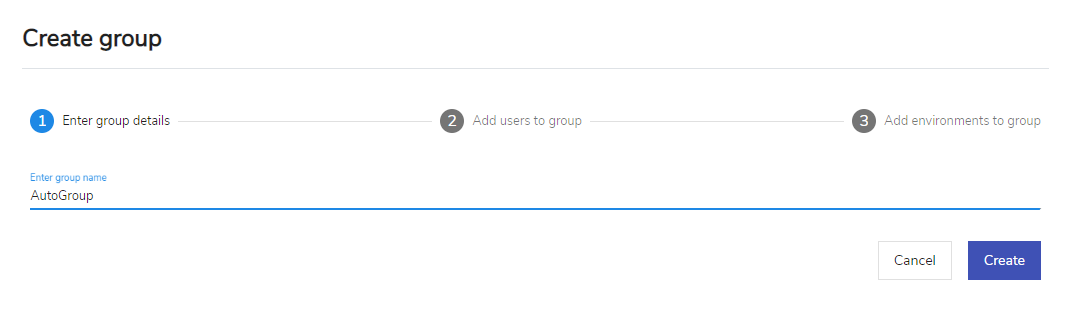
Fig. 3.122 Enter Group Details
Click Create. The group is created and you are navigated to the next tab. Once you create a group, you need to add users to the group, assign environment and roles to the group. You can choose to perform these tasks now or later. The newly created group is added to the list of groups on the Groups screen.
On the Add users to group tab, you can view the Users list box on the left and Group users box on the right. Users list box displays the list of all users under the account you are managing. Group users box displays the list of users who will be assigned to the particular group.
In the Users list box, click to select the user you want to add to the group and then click > icon to add that user to the Group users box on the right. Inversely, click to select the user you want to remove from the Group users box and then click the < icon.
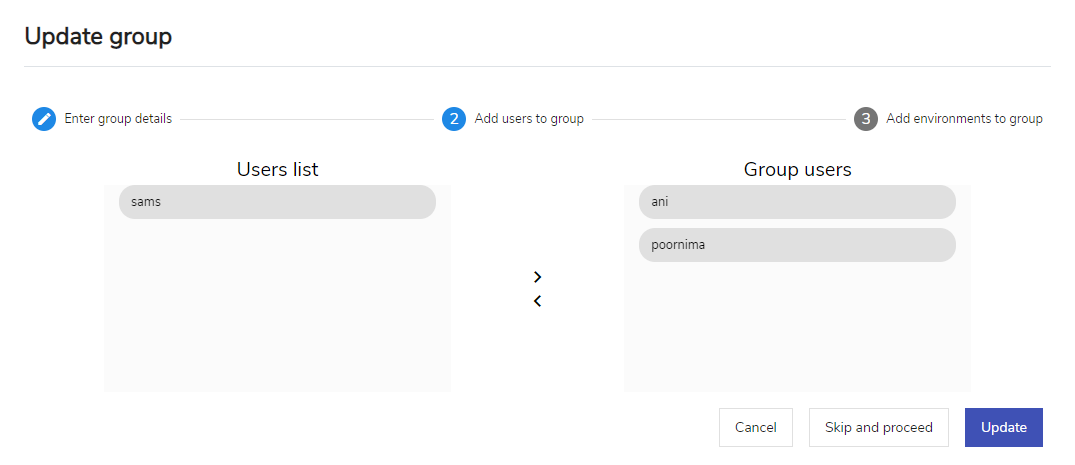
Fig. 3.123 Create Group – Add users to group
Click Update to confirm or click Skip and proceed to go to the next tab without adding users to a group.
Under the Add environments to group tab, click the plus icon
to expand the Assign environments to group tab and add an environment.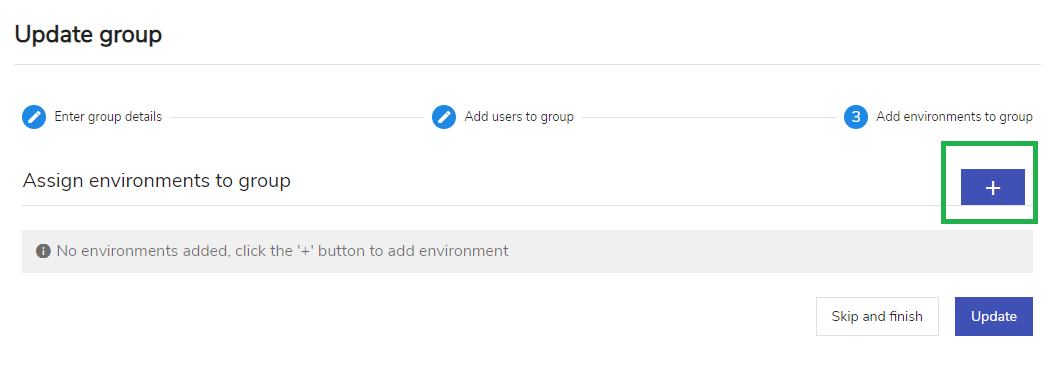
Fig. 3.124 Create Group – Add environment to group
Click Select environment to select the required environment from the list.
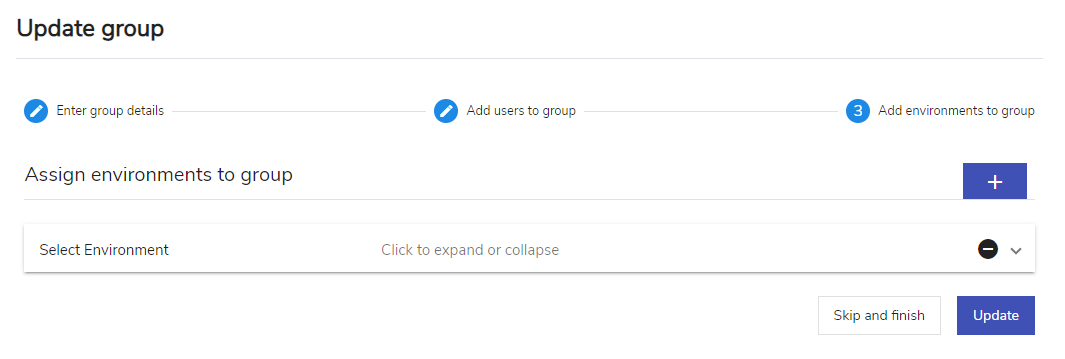
Fig. 3.125 Create Group – Add environment to group
Note
- You can assign a group to more than one environment.
- You can only choose environment from a list of already created environments.
- Choose roles for the selected environment. The roles that are attached to the environment will be displayed. Click the required check box to select the role. You can dissociate a role by deselecting the check box corresponding to that role.
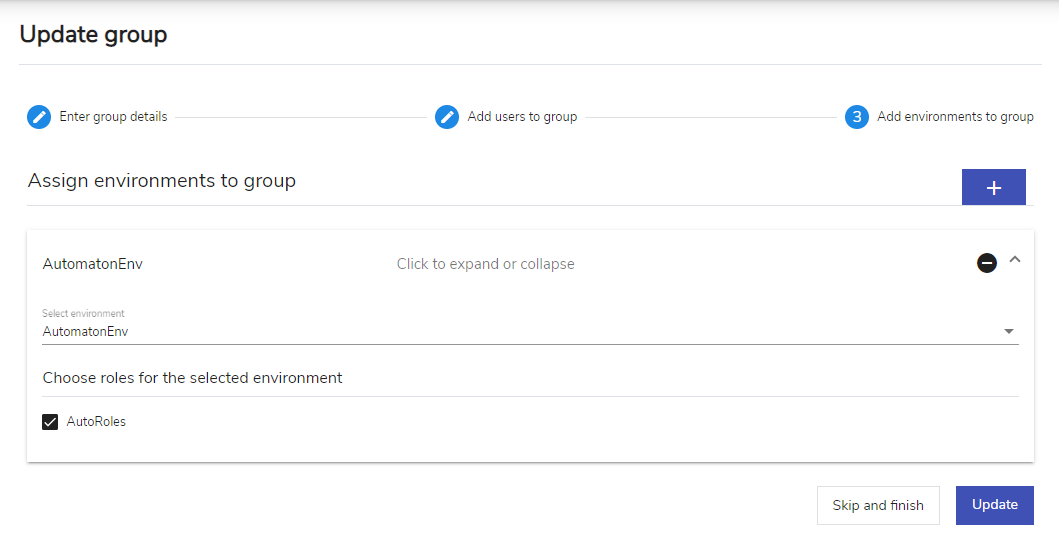
Fig. 3.126 Create Group – Add roles
- Click Update to to complete the group creation process or click Skip and finish to exit without adding the environemnt or role to a group.
The Groups screen displays details such as Group name, Created by, Created on and Actions for each group. As an Admin, you can edit or delete groups created by you using the edit or delete icons ![]() respectively.
respectively.
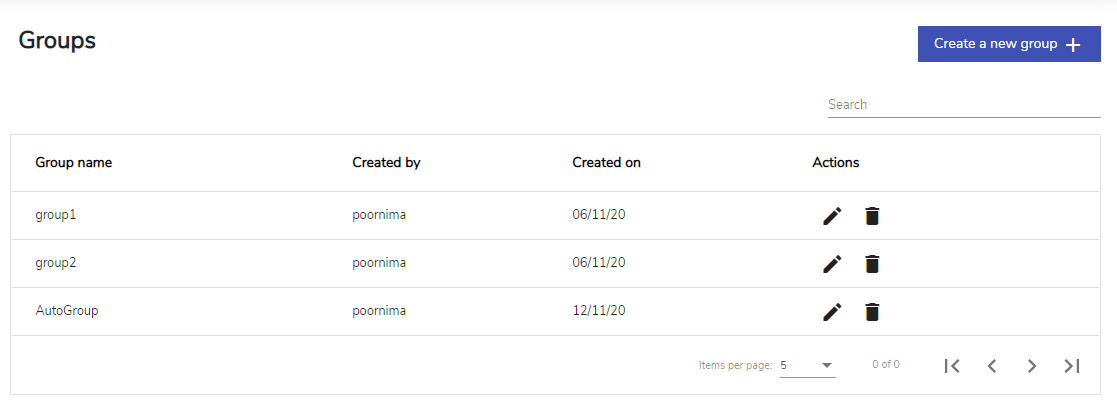
Fig. 3.127 Edit/Delete Groups
To search for a group:
Use the Search option to search for a group from the list of groups.
To search for a particular group from the list, type in search criteria like Group Name.
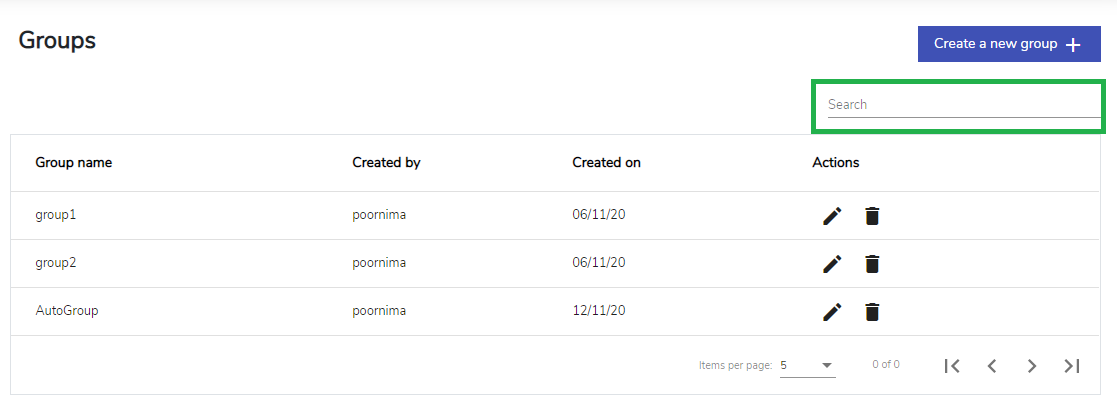
Fig. 3.128 Search Groups
3.7.2. Edit a Group
To edit a group:
Click the edit icon
corresponding to the group you want to edit.
Fig. 3.129 Update Group
The Update group screen is displayed. Make the required modifications to the Enter group details/ Add users to group/ Add environments to group tab
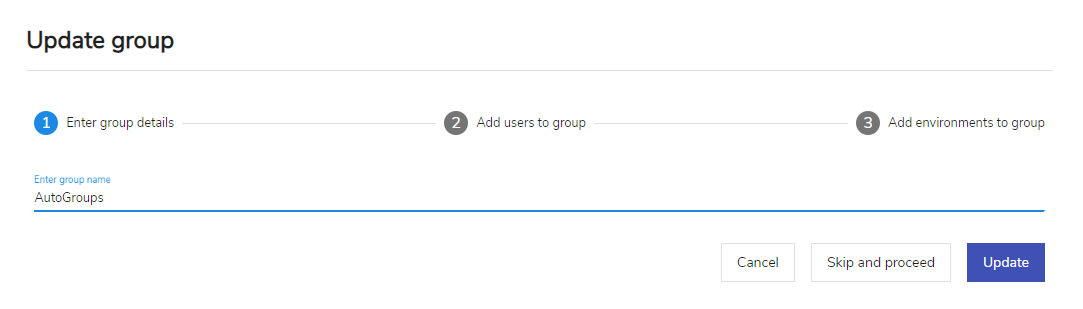
Fig. 3.130 Update Group
Click Update to save the changes.
3.7.3. Delete a Group
To delete a group:
Click the delete icon
corresponding to group you wish to delete.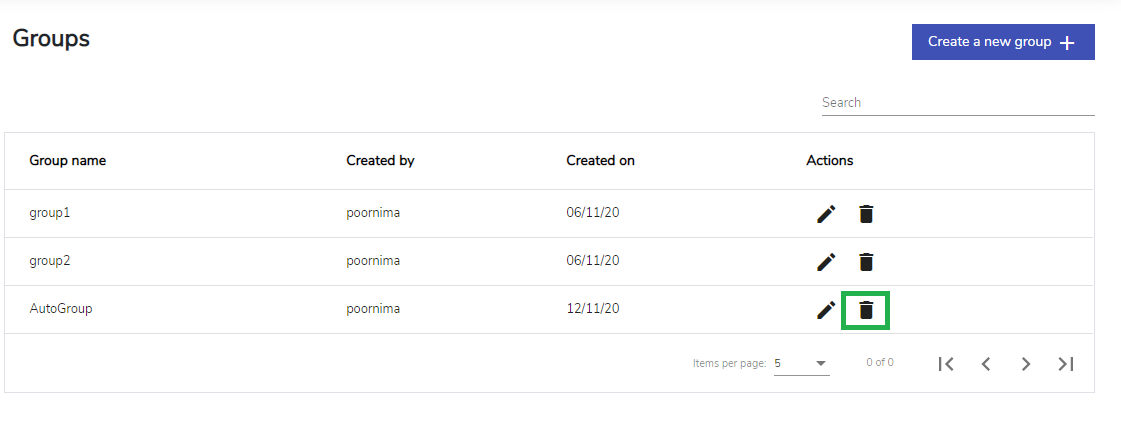
Fig. 3.131 Delete Group
A confirmation message displays asking you to confirm your action. Click Yes to delete the group.
Fig. 3.132 Delete Group
Note
Only Admins can create/edit/delete groups.